nginx
Nginx 是高性能的 HTTP 服务器和反向代理,以低内存占用和高并发能力著称,广泛用于静态资源托管、负载均衡和 API 网关场景。本文介绍在 RHEL/CentOS 和 Debian/Ubuntu 上的安装方式及常用配置。
Nginx 官方文档:http://nginx.org/en/docs/
二进制安装文档:http://nginx.org/en/docs/configure.html
最新标准版为 1.18,下载地址是:http://nginx.org/en/download.html
Nignx安装
# RHEL/CentOS
sudo yum install yum-utils

# /etc/yum.repos.d/nginx.repo
[nginx-stable]
name=nginx stable repo
baseurl=http://nginx.org/packages/centos/$releasever/$basearch/
gpgcheck=1
enabled=1
gpgkey=https://nginx.org/keys/nginx_signing.key
module_hotfixes=true

[nginx-mainline]
name=nginx mainline repo
baseurl=http://nginx.org/packages/mainline/centos/$releasever/$basearch/
gpgcheck=1
enabled=0
gpgkey=https://nginx.org/keys/nginx_signing.key
module_hotfixes=true

sudo yum-config-manager --enable nginx-mainline
sudo yum install nginx

# Debian
sudo apt install curl gnupg2 ca-certificates lsb-release debian-archive-keyring
curl https://nginx.org/keys/nginx_signing.key | gpg --dearmor \
    | sudo tee /usr/share/keyrings/nginx-archive-keyring.gpg >/dev/null

gpg --dry-run --quiet --import --import-options import-show /usr/share/keyrings/nginx-archive-keyring.gpg

# 设置稳定版
echo "deb [signed-by=/usr/share/keyrings/nginx-archive-keyring.gpg] \
http://nginx.org/packages/debian `lsb_release -cs` nginx" \
    | sudo tee /etc/apt/sources.list.d/nginx.list

# 设置主线版
echo "deb [signed-by=/usr/share/keyrings/nginx-archive-keyring.gpg] \
http://nginx.org/packages/mainline/debian `lsb_release -cs` nginx" \
    | sudo tee /etc/apt/sources.list.d/nginx.list

# 设置固定存储库
echo -e "Package: *\nPin: origin nginx.org\nPin: release o=nginx\nPin-Priority: 900\n" \
    | sudo tee /etc/apt/preferences.d/99nginx

sudo apt update
sudo apt install nginx

# Ubuntu
sudo apt install curl gnupg2 ca-certificates lsb-release ubuntu-keyring
curl https://nginx.org/keys/nginx_signing.key | gpg --dearmor \
    | sudo tee /usr/share/keyrings/nginx-archive-keyring.gpg >/dev/null

gpg --dry-run --quiet --import --import-options import-show /usr/share/keyrings/nginx-archive-keyring.gpg

echo "deb [signed-by=/usr/share/keyrings/nginx-archive-keyring.gpg] \
http://nginx.org/packages/ubuntu `lsb_release -cs` nginx" \
    | sudo tee /etc/apt/sources.list.d/nginx.list

echo "deb [signed-by=/usr/share/keyrings/nginx-archive-keyring.gpg] \
http://nginx.org/packages/mainline/ubuntu `lsb_release -cs` nginx" \
    | sudo tee /etc/apt/sources.list.d/nginx.list

echo -e "Package: *\nPin: origin nginx.org\nPin: release o=nginx\nPin-Priority: 900\n" \
    | sudo tee /etc/apt/preferences.d/99nginx

sudo apt update
sudo apt install nginx
编译安装
# 安装编译环境:
$ yum -y install gcc pcre pcre-devel zlib zlib-devel openssl openssl-devel
# 创建用户:
$ useradd -r nginx

# 配置:
$ ./configure \
    --user=root \
    --group=root \
    --prefix=/usr/local/nginx/ \
    --sbin-path=/usr/bin/nginx \
    --conf-path=/etc/nginx/nginx.conf \
    --error-log-path=/var/log/nginx/error.log \
    --http-log-path=/var/log/nginx/access.log \
    --pid-path=/var/run/nginx/nginx.pid \
    --lock-path=/var/run/nginx/nginx.lock \
    --http-client-body-temp-path=/var/lib/nginx/client_body_temp \
    --http-proxy-temp-path=/var/lib/nginx/proxy_temp \
    --http-fastcgi-temp-path=/var/lib/nginx/fastcgi_temp \
    --http-uwsgi-temp-path=/var/lib/nginx/uwsgi_temp \
    --http-scgi-temp-path=/var/lib/nginx/scgi_temp \
    --with-http_ssl_module

# 编译
$ make && make install

# 验证安装
$ nginx -V

返回了安装时配置的参数,这些参数配置是卸载 Nginx 时的依据。

# 启动 创建目录并赋予权限:
$ sudo mkdir /var/lib/nginx
$ sudo chown -R nginx:nginx /etc/nginx/
$ sudo chown -R nginx:nginx /var/lib/nginx
$ sudo chown -R nginx:nginx /var/run/nginx
$ sudo chown -R nginx:nginx /var/log/nginx

# 创建启动文件
# 创建 `/usr/lib/systemd/system/nginx.service` :
[Unit]
Description=The nginx HTTP and reverse proxy server
After=network.target remote-fs.target nss-lookup.target

[Service]
Type=forking
PIDFile=/var/run/nginx/nginx.pid
# Nginx will fail to start if /run/nginx.pid already exists but has the wrong
# SELinux context. This might happen when running `nginx -t` from the cmdline.
# https://bugzilla.redhat.com/show_bug.cgi?id=1268621
ExecStartPre=/usr/bin/rm -f /var/run/nginx/nginx.pid
ExecStartPre=/usr/bin/nginx -t
ExecStart=/usr/bin/nginx
ExecReload=/bin/kill -s HUP $MAINPID
KillSignal=SIGQUIT
TimeoutStopSec=5
KillMode=process
PrivateTmp=true

[Install]
WantedBy=multi-user.target

# 启动nginx
$ sudo systemctl enable nginx
$ sudo systemctl start nginx
容器启动
docker run \
-p 88:80 \
-p 443:443 \
--name nginx \
-v /data/nginx/conf/nginx.conf:/etc/nginx/nginx.conf \
-v /data/nginx/cert:/etc/nginx/cert \
-v /data/nginx/conf/conf.d:/etc/nginx/conf.d \
-v /data/nginx/logs:/var/log/nginx \
-v /data/nginx/html:/usr/share/nginx/html \
-d nginx:latest
总结
上面这套步骤和 yum 安装的没有很大差别,源码安装的好处在于可以自定义,可以灵活选择版本、模块。
Nginx配置文件
	Nginx主配置文件/etc/nginx/nginx.conf是一个纯文本类型的文件,整个配置文件是以区块的形式组织的。一般,每个区块以一对大括号{}来表示开始与结束。

	1.Main位于nginx.conf配置文件的最高层
	2.Main层下可以有Event、HTTP层
	3.HTTP层下面有允许有多个Server层, 用于对不同的网站做不同的配置
	4.Server层也允许有多个Location, 用于对不同的路径进行不同模块的配置
nginx基本配置
//nginx默认配置语法
worker_processes    //工作进程, 配置和CPU个数保持一致
error_log           //错误日志, 后面接入的是路径
pid                 //Nginx服务启动时的pid

//events事件模块
events {    //事件模块
    worker_connections  1024;   //每个worker进程支持的最大连接数
    use                 //内核模型,select,poll,epoll
}

//非虚拟主机的配置或公共配置定义在http{}段内, server{}段外
http {
...
    //必须使用虚拟机配置站点, 每个虚拟机使用一个server{}段
    server {
        listen       80;    //监听端口, 默认80
        server_name  localhost; //提供服务的域名或主机名

        //控制网站访问路径
        location / {
            root   /usr/share/nginx/html;   //存放网站路径
            index  index.html index.htm;    //默认访问首页文件
        }
        //错误页面,统一定义错误页面
        error_page   500 502 503 504  /50x.html;

        //错误代码重定向到新的Locaiton
        location = /50x.html {
            root   html;
        }
    }
    ...
    //第二个虚拟主机配置
    server {
    ...
    }
}
Nginx日志配置
// 配置语法: 包括: error.log access.log
Syntax: log_format name [escape=default|json] string ...;
Default:    log_format combined "...";
Context:    http

// Nginx默认配置
log_format  main  '$remote_addr - $remote_user [$time_local] "$request" '
                   '$status $body_bytes_sent "$http_referer" '
                  '"$http_user_agent" "$http_x_forwarded_for"';

$remote_addr    		// 表示客户端地址
$remote_user    		// http客户端请求nginx认证用户名
$time_local     		// Nginx的时间
$request        		// Request请求行, GET等方法、http协议版本
$status         		// respoence返回状态码
$body_bytes_sent    	// 从服务端响应给客户端body信息大小
$http_referer       	// http上一级页面, 防盗链、用户行为分析
$http_user_agent    	// http头部信息, 客户端访问设备
$http_x_forwarded_for   // http请求携带的http信息
Nginx状态监控
--with-http_stub_status_module 记录Nginx客户端基本访问状态信息
Syntax: stub_status;
Default:    —
Context:    server, location

# 具体配置如下:
location /mystatus {
    stub_status on;
    access_log off;
}

// Nginx_status概述
Active connections:2    //Nginx当前活跃连接数
server accepts handled requests
16     16     19
server表示Nginx启动到现在共处理了16个连接。
accepts表示Nginx启动到现在共成功创建16次握手。
请求丢失数=(握手数-连接数)可以看出,本次状态显示没有丢失请求。
handled requests,表示总共处理了19次请求。
Reading     Nginx读取到客户端的 Header 信息数。
Writing     Nginx返回给客户端的 Header 信息数。
Waiting    Nginx开启keep-alive长连接情况下, 既没有读也没有写, 建立连接情况
Nginx下载配置
Nginx默认是不允许列出整个目录浏览下载。
Syntax: autoindex on | off;
Default:
autoindex off;
Context:    http, server, location

//autoindex常用参数
autoindex_exact_size off;
默认为on, 显示出文件的确切大小,单位是bytes。
修改为off,显示出文件的大概大小,单位是kB或者MB或者GB。

autoindex_localtime on;
默认为off,显示的文件时间为GMT时间。
修改为on, 显示的文件时间为文件的服务器时间。

charset utf-8,gbk;
默认中文目录乱码,添加上解决乱码。
配置目录浏览功能
// 开启目录浏览
location / {
    root html;
    autoindex on;
    autoindex_localtime on;
    autoindex_exact_size off;
}
Nginx访问限制
连接频率限制 limit_conn_module
请求频率限制 limit_req_module
http协议的连接与请求 HTTP是建立在TCP, 在完成HTTP请求需要先建立TCP三次握手(称为TCP连接),在连接的基础上在HTTP请求。
HTTP请求建立在一次TCP连接基础上,一次TCP请求至少产生一次HTTP请求
| HTTP协议版本 | 连接关系 |
|---|---|
| HTTP1.0 | TCP不能复用 |
| HTTP1.1 | 顺序性TCP复用 |
| HTTP2.0 | 多路复用TCP复用 |
Nginx连接限制配置:
//全局定义连接限制
Syntax:  limit_conn_zone key zone=name:size;
Default: —
Context: http
//引用连接限制
Syntax: limit_conn zone number;
Default: —
Context: http, server, location


//具体配置如下:
http {
//http段配置连接限制, 同一时刻只允许一个客户端IP连接
limit_conn_zone $binary_remote_addr zone=conn_zone:10m;
    ...
    server {
    ...

        location / {
        //同一时刻只允许一个客户端IP连接
            limit_conn conn_zone 1;
        }


//压力测试
yum install -y httpd-tools
ab -n 50 -c 20  http://127.0.0.1/index.html
Nginx请求限制配置:
//全局定义请求限制
Syntax:  limit_conn_zone key zone=name:size rate=rate;
Default: —
Context: http
//引用请求限制
Syntax: limit_conn zone number [burst=number] [nodelay];
Default: —
Context: http, server, location


//具体配置如下:
http {
//http段配置请求限制, rate限制速率,限制一秒钟最多一个IP请求
limit_req_zone $binary_remote_addr zone=req_zone:10m rate=1r/s;
    ...
    server {
    ...

        location / {
        //1r/s只接收一个请求,其余请求拒绝处理并返回错误码给客户端
            limit_req zone=req_zone;
        //请求超过1r/s,剩下的将被延迟处理,请求数超过burst定义的数量, 多余的请求返回503
            #limit_req zone=req_zone burst=3 nodelay;
        }


//压力测试
yum install -y httpd-tools
ab -n 50 -c 20  http://127.0.0.1/index.html

连接限制没有请求限制有效?

我们前面说过, 多个请求可以建立在一次的TCP连接之上, 那么我们对请求的精度限制,当然比对一个连接的限制会更加的有效。 因为同一时刻只允许一个连接请求进入。但是同一时刻多个请求可以通过一个连接进入。所以请求限制才是比较优的解决方案。
Nginx访问控制
基于IP的访问控制 http_access_module
基于用户登陆认证 http_auth_basic_module
基于IP的访问控制
//允许配置语法
Syntax: allow address | CIDR | unix: | all;
Default:    —
Context:    http, server, location, limit_except
//拒绝配置语法
Syntax: deny address | CIDR | unix: | all;
Default:    —
Context:    http, server, location, limit_except

//配置拒绝某一个IP, 其他全部允许
location ~ ^/1.html {
    root /usr/share/nginx/html;
    index index.html;
    deny 192.168.56.1;
    allow all;
}

//只允许某一个网段访问,其它全部拒绝
location / {
    root   html;
    index  index.php index.html index.htm;
    allow   192.168.56.0/24;
    deny    all;
}
使用http_access_module会有局限性
解决方式:
1、采用HTTP头信息控制访问, 代理以及web服务开启http_x_forwarded_for
2、结合geo模块作
3、通过HTTP自动以变量传递
基于用户登陆认证
//配置语法
Syntax: auth_basic string| off;
Default:    auth_basic off;
Context:    http, server, location, limit_except
//用户密码记录配置文件
Syntax: auth_basic_user_file file;
Default:    -
Context:    http, server, location, limit_except


//需要安装依赖组件
[root@xuliangwei ~]# yum install httpd-tools
[root@xuliangwei ~]# htpasswd -c /etc/nginx/auth_conf xuliangwei

//可在http,server,location下添加如下信息
auth_basic "Auth access Blog Input your Passwd!";
auth_basic_user_file /etc/nginx/auth_conf;
用户认证局限性: 1.用户信息依赖文件方式 2.操作管理机械,效率低下
解决办法:
1.Nginx结合LUA实现高效验证
2.Nginx结合LDAP, 利用nginx-auth-ldap模块
Nginx虚拟主机
所谓虚拟主机,在web服务器里是一个独立的网站站点,这个站点对应独立的域名(也可能是IP或端口),具有独立的程序及资源目录,可以独立地对外提供服务供用户访问。
配置基于域名虚拟主机
# 创建web站点目录
[root@LNMP conf]# mkdir /soft/code/{www,bbs}
[root@LNMP conf]# echo "www" > /soft/code/www/index.html
[root@LNMP conf]# echo "bbs" > /soft/code/bbs/index.html

# 配置虚拟主机
[root@LNMP conf]# cat conf.d/{www,bbs}.conf
server {
    listen       80;
    server_name  www.xuliangwei.com;
    root /soft/code/www;
    ...
}

server {
    ...
    listen       80;
    server_name  bbs.xuliangwei.com;
    root /soft/code/bbs;
}
配置不同端口访问不同虚拟主机
//仅修改listen监听端口即可, 但不能和系统端口发生冲突
server {
    ...
    listen       8001;
    ...
}

server {
    ...
    listen       8002;
    ...
}
配置虚拟主机别名
所谓虚拟主机别名,就是虚拟主机设置除了主域名以外的一个域名,实现用户访问的多个域名对应同一个虚拟主机网站的功能。

以www.xuliangwei.com域名的虚拟主机为例:
为其增加一个别名xuliangwei.com时,出现网站内容和访问www.xuliangwei.com是一样的,具体配置如下:

// 默认配置
[root@LNMP ~]# vim /etc/nginx/nginx.conf
server {
    listen       80;
    server_name www.xuliangwei.com;
}

// 别名配置
[root@LNMP ~]# vim /etc/nginx/nginx.conf
server {
    listen       80;
    server_name  www.xuliangwei.com xuliangwei.com;
    ...
}

// 使用Linux下curl测试结果
[root@LNMP conf]# curl xuliangwei.com
www.xuliangwei.com
[root@LNMP conf]# curl www.xuliangwei.com
www.xuliangwei.com

// 访问带www和不带www是一样的, 除了别名实现也可以通过rewrite实现
Nginx静态服务器
Nginx作为静态资源Web服务器部署配置, 传输非常的高效, 常常用于静态资源处理, 请求, 动静分离
静态资源:非服务器动态运行生成的文件属于静态资源,可以减小传输延迟最小化
| 类型 | 种类 |
|---|---|
| 浏览器端渲染 | HTML、CSS、JS |
| 图片 | JPEG、GIF、PNG |
| 视频 | FLV、Mp4 |
| 文件 | TXT、任意下载文件 |
静态资源配置语法
1.文件读取高效sendfile
Syntax: sendfile on | off;
Default: sendfile off;
Context: http, server, location, if in location

2.提高网络传输效率nopush
Syntax: tcp_nopush on | off;
Default: tcp_nopush off;
Context: http, server, location
作用: sendfile开启情况下, 提高网络包的'传输效率'

3.与tcp_nopush之对应的配置tcp_nodelay
Syntax: tcp_nodelay on | off;
Default: tcp_nodelay on;
Context: http, server, location
作用: 在keepalive连接下,提高网络的传输'实时性'
静态资源文件压缩
Nginx将响应报文发送至客户端之前可以启用压缩功能,这能够有效地节约带宽,并提高响应至客户端的速度。
1.gzip压缩配置语法
Syntax: gzip on | off;
Default: gzip off;
Context: http, server, location, if in location
作用: 传输压缩

2.gzip压缩比率配置语法
Syntax: gzip_comp_level level;
Default: gzip_comp_level 1;
Context: http, server, location
作用: 压缩本身比较耗费服务端性能

3.gzip压缩协议版本
Syntax: gzip_http_version 1.0 | 1.1;
Default: gzip_http_version 1.1;
Context: http, server, location
作用: 压缩使用在http哪个协议, 主流版本1.1

4.扩展压缩模块
Syntax: gzip_static on | off | always;
Default: gzip_static off;
Context: http, server, location
作用: 预读gzip功能

5.图片压缩案例
[root@Nginx conf.d]# mkdir -p /soft/code/images
[root@Nginx conf.d]# cat static_server.conf
server {
        listen 80;
        server_name 192.168.56.11;
        sendfile on;
        access_log /var/log/nginx/static_access.log main;

        location ~ .*\.(jpg|gif|png)$ {
                gzip on;
                gzip_http_version 1.1;
                gzip_comp_level 2;
                gzip_types text/plain application/json application/x-javascript application/css application/xml application/xml+rss text/javascript application/x-httpd-php image/jpeg image/gif image/png;
                root /soft/code/images;
        }
}


6.文件压缩案例
[root@Nginx conf.d]# mkdir -p /soft/code/doc
[root@Nginx conf.d]# cat static_server.conf
server {
    listen 80;
    server_name 192.168.56.11;
    sendfile on;
    access_log /var/log/nginx/static_access.log main;
    location ~ .*\.(txt|xml)$ {
        gzip on;
        gzip_http_version 1.1;
        gzip_comp_level 1;
        gzip_types text/plain application/json application/x-javascript application/css application/xml application/xml+rss text/javascript application/x-httpd-php image/jpeg image/gif image/png;
        root /soft/code/doc;
    }
}
静态资源浏览器缓存
HTTP协议定义的缓存机制(如: Expires; Cache-control 等)
1.浏览器无缓存
浏览器请求->无缓存->请求WEB服务器->请求响应->呈现
2.浏览器有缓存
浏览器请求->有缓存->校验过期->是否有更新->呈现
校验是否过期 Expires HTTP1.0, Cache-Control(max-age) HTTP1.1 协议中Etag头信息校验 Etag () Last-Modified头信息校验 Last-Modified (具体时间)
1.缓存配置语法expires
Syntax: expires [modified] time;
expires epoch | max | off;
Default: expires off;
Context: http, server, location, if in location
作用: 添加Cache-Control Expires头

2.配置静态资源缓存
location ~ .*\.(js|css|html)$ {
    root /soft/code/js;
    expires      1h;
}

location ~ .*\.(jpg|gif|png)$ {
    root /soft/code/images;
    expires      7d;
}

3.开发代码没有正式上线时, 希望静态文件不被缓存
//取消js css html等静态文件缓存

location ~ .*\.(css|js|swf|json|mp4|htm|html)$ {
	add_header Cache-Control no-store;
	add_header Pragma no-cache;
}
静态资源跨域访问
浏览器禁止跨域访问, 主要不安全, 容易出现CSRF攻击
Nginx跨域访问配置
Syntax: add_header name value [always];
Default: —
Context: http, server, location, if in location

Access-Control-Allow-Origin1.准备html文件
//在www.xuliangwei.com网站添加跨越访问文件
[root@Nginx ~]# cat /soft/code/http_origin.html
<html lang="en">
<head>
        <meta charset="UTF-8" />
        <title>测试ajax和跨域访问</title>
        <script src="http://libs.baidu.com/jquery/2.1.4/jquery.min.js"></script>
</head>
<script type="text/javascript">
$(document).ready(function(){
        $.ajax({
        type: "GET",
        url: "http://kt.xuliangwei.com/index.html",
        success: function(data) {
                alert("sucess!!!");
        },
        error: function() {
                alert("fail!!,请刷新再试!");
        }
        });
});
</script>
        <body>
                <h1>测试跨域访问</h1>
        </body>
</html>2.配置Nginx跨域访问
//运行www.xuliangwei.com域名跨域访问
[root@Nginx conf.d]# cat origin.conf
server {
    listen 80;
    server_name kt.xuliangwei.com;
    sendfile on;
    access_log /var/log/nginx/kuayue.log main;
    location ~ .*\.(html|htm)$ {
        add_header Access-Control-Allow-Origin https://www.xuliangwei.com;
        add_header Access-Control-Allow-Methods GET,POST,PUT,DELETE,OPTIONS;
        root /soft/code;
    }
}
静态资源防盗链
防盗链指的是在自己的界面展示不在自己服务器上的内容,通过技术手段获得他人服务器的资源地址,绕过别人资源展示页面,在自己页面向用户提供此内容,从而减轻自己服务器的负担,因为真实的空间和流量来自别人服务器
防盗链设置思路: 区别哪些请求是非正常用户请求
基于http_refer防盗链配置模块
Syntax: valid_referers none | blocked | server_names | string ...;
Default: —
Context: server, location
1.准备html文件
<html>
    <head>
        <meta charset="utf-8">
        <title>pachong<title>
    </head>
    <body style="background-color:red;">
    <img src="http://192.168.69.113/test.jpg">
    </body>
</html>
2.启动防盗链
//支持IP、域名、正则方式
location ~ .*\.(jpg|gif|png)$ {
valid_referers none blocked www.xuliangwei.com;
    if ($invalid_referer) {
        return 403;
    }
root /soft/code/images;
}
3.验证
//伪造协议头访问
[root@C-Server ~]# curl -e "http://www.baidu.com" -I http://192.168.69.113/test.jpg
HTTP/1.1 403 Forbidden
Server: nginx/1.12.2
Date: Tue, 17 Apr 2018 04:55:18 GMT
Content-Type: text/html
Content-Length: 169
Connection: keep-alive


//伪造协议头访问
[root@C-Server ~]# curl -e "https://www.xuliangwei.com" -I http://192.168.69.113/test.jpg
HTTP/1.1 200 OK
Server: nginx/1.12.2
Date: Tue, 17 Apr 2018 04:55:27 GMT
Content-Type: image/jpeg
Content-Length: 174315
Last-Modified: Wed, 29 Nov 2017 03:16:08 GMT
Connection: keep-alive
ETag: "5a1e2678-2a8eb"
Expires: Tue, 17 Apr 2018 16:55:27 GMT
Cache-Control: max-age=43200
Accept-Ranges: bytes
Nginx代理服务器
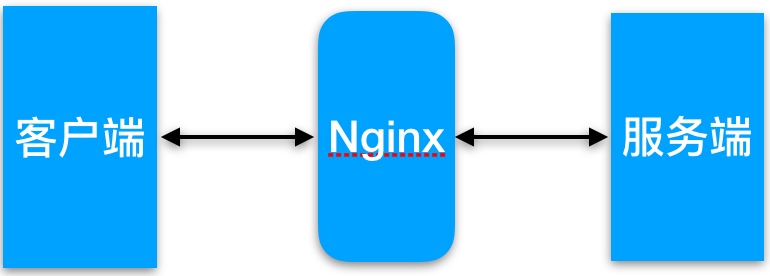
代理我们往往并不陌生, 该服务我们常常用到如(代理租房、代理收货等等)
那么在互联网请求里面, 客户端无法直接向服务端发起请求, 那么就需要用到代理服务, 来实现客户端和服务通信
Nginx作为代理服务可以实现很多的协议代理, 我们主要以http代理为主
正向代理(内部上网) 客户端<–>代理->服务端
反向代理 客户端->代理<–>服务端
代理区别
区别在于代理的对象不一样 正向代理代理的对象是客户端 反向代理代理的对象是服务端
Nginx代理配置语法
1.Nginx代理配置语法
Syntax: proxy_pass URL;
Default:    —
Context:    location, if in location, limit_except

http://localhost:8000/uri/
http://192.168.56.11:8000/uri/
http://unix:/tmp/backend.socket:/uri/2.类似于nopush缓冲区
//尽可能收集所有头请求,
Syntax: proxy_buffering on | off;
Default:
proxy_buffering on;
Context:    http, server, location

//扩展:
proxy_buffer_size
proxy_buffers
proxy_busy_buffer_size
3.跳转重定向
Syntax: proxy_redirect default;
proxy_redirect off;proxy_redirect redirect replacement;
Default:    proxy_redirect default;
Context:    http, server, location
4.头信息
Syntax: proxy_set_header field value;
Default:    proxy_set_header Host $proxy_host;
            proxy_set_header Connection close;
Context:    http, server, location

//扩展:
proxy_hide_header
proxy_set_body5.代理到后端的TCP连接超时
Syntax: proxy_connect_timeout time;
Default: proxy_connect_timeout 60s;
Context: http, server, location

//扩展
proxy_read_timeout  //以及建立
proxy_send_timeout //服务端请求完, 发送给客户端时间6.Proxy常见配置项具体配置如下:
[root@Nginx ~]# vim /etc/nginx/proxy_params
proxy_redirect default;
proxy_set_header Host $http_host;
proxy_set_header X-Real-IP $remote_addr;
proxy_set_header X-Forwarded-For $proxy_add_x_forwarded_for;

proxy_connect_timeout 30;
proxy_send_timeout 60;
proxy_read_timeout 60;

proxy_buffer_size 32k;
proxy_buffering on;
proxy_buffers 4 128k;
proxy_busy_buffers_size 256k;
proxy_max_temp_file_size 256k;

//具体location实现
location / {
    proxy_pass http://127.0.0.1:8080;
    include proxy_params;
}
Nginx正向代理示例
Nginx正向代理配置实例
// 配置69.113访问限制,仅允许同网段访问
location ~ .*\.(jpg|gif|png)$ {
    allow 192.168.69.0/24;
    deny all;
    root /soft/code/images;


// 配置正向代理
[root@Nginx ~]# cat /etc/nginx/conf.d/zy_proxy.conf
server {
    listen       80;

    resolver 233.5.5.5;
    location / {
        proxy_pass http://$http_host$request_uri;
        proxy_set_header Host $http_host;
        proxy_set_header X-Real-IP $remote_addr;
        proxy_set_header X-Forwarded-For $proxy_add_x_forwarded_for;
    }
}

// 客户端使用SwitchySharp浏览器插件配置正向代理
启用正向代理后可以突破访问限制
Nginx反向代理示例
Nginx反向代理配置实例
// proxy代理
[root@proxy ~]# cat /etc/nginx/conf.d/proxy.conf
server {
    listen 80;
    server_name nginx.bjstack.com;
    index index.html;

    location / {
    proxy_pass http://192.168.56.100;
    include proxy_params;
    }
}

// WEB站点
[root@Nginx ~]# cat /etc/nginx/conf.d/images.conf
server {
    listen 80;
    server_name nginx.bjstack.com;
    root /soft/code;

    location / {
        root /soft/code;
        index index.html;
    }

    location ~ .*\.(png|jpg|gif)$ {
    gzip on;
    root /soft/code/images;
    }
}
Nginx负载均衡
提升吞吐率, 提升请求性能, 提高容灾
负载均衡按范围划分:GSLB全局负载均衡、SLB
负载均衡按层级划分: 分为四层负载均衡和七层负载均衡
Nginx是一个典型的七层SLB
Nginx负载均衡配置场景
Nginx实现负载均衡用到了proxy_pass代理模块核心配置, 将客户端请求代理转发至一组upstream虚拟服务池
Nginx upstream虚拟配置语法
Syntax: upstream name { ... }
Default: -
Context: http

//upstream例子
upstream backend {
    server backend1.example.com       weight=5;
    server backend2.example.com:8080;
    server unix:/tmp/backend3;
    server backup1.example.com:8080   backup;
}
server {
    location / {
        proxy_pass http://backend;
    }
}1.创建对应html文件
[root@Nginx ~]# mkdir /soft/{code1,code2,code3} -p
[root@Nginx ~]# cat /soft/code1/index.html
<html>
        <title> Code1</title>
        <body bgcolor="red">
                <h1> Code1-8081 </h1>
        </body>
</html>

[root@Nginx ~]# cat /soft/code2/index.html
<html>
        <title> Coder2</title>
        <body bgcolor="blue">
                <h1> Code1-8082</h1>
        </body>
</html>

[root@Nginx ~]# cat /soft/code3/index.html
<html>
        <title> Coder3</title>
        <body bgcolor="green">
                <h1> Code1-8083</h1>
        </body>
</html>2.建立对应的releserver.conf配置文件
[root@Nginx ~]# cat /etc/nginx/conf.d/releserver.conf
server {
    listen 8081;
    root /soft/code1;
    index index.html;
}

server {
    listen 8082;
    root /soft/code2;
    index index.html;
}

server {
    listen 8083;
    root /soft/code3;
    index index.html;
}3.配置Nginx反向代理
[root@Nginx ~]# cat /etc/nginx/conf.d/proxy.conf
upstream node {
    server 192.168.69.113:8081;
    server 192.168.69.113:8082;
    server 192.168.69.113:8083;
}

server {
    server_name 192.168.69.113;
    listen 80;
    location / {
        proxy_pass http://node;
        include proxy_params;
    }
}
4.使用浏览器验证
Nginx负载均衡状态配置
后端服务器在负载均衡调度中的状态
| 状态 | 概述 |
|---|---|
| down | 当前的server暂时不参与负载均衡 |
| backup | 预留的备份服务器 |
| max_fails | 允许请求失败的次数 |
| fail_timeout | 经过max_fails失败后, 服务暂停时间 |
| max_conns | 限制最大的接收连接数 |
测试backup以及down状态
upstream load_pass {
    server 192.168.56.11:8001 down;
    server 192.168.56.12:8002 backup;
    server 192.168.56.13:8003 max_fails=1 fail_timeout=10s;
}

location  / {
    proxy_pass http://load_pass;
    include proxy_params;
}

//关闭8003测试
Nginx负载均衡调度策略
| 调度算法 | 概述 |
|---|---|
| 轮询 | 按时间顺序逐一分配到不同的后端服务器(默认) |
| weight | 加权轮询,weight值越大,分配到的访问几率越高 |
| ip_hash | 每个请求按访问IP的hash结果分配,这样来自同一IP的固定访问一个后端服务器 |
| url_hash | 按照访问URL的hash结果来分配请求,是每个URL定向到同一个后端服务器 |
| least_conn | 最少链接数,那个机器链接数少就分发 |
| hash关键数值 | hash自定义的key |
Nginx负载均衡权重轮询具体配置
upstream load_pass {
    server 192.168.56.11:8001;
    server 192.168.56.12:8002 weight=5;
    server 192.168.56.13:8003;
}Nginx负载均衡ip_hash具体配置
//如果客户端都走相同代理, 会导致某一台服务器连接过多
upstream load_pass {
    ip_hash;
    server 192.168.56.11:8001;
    server 192.168.56.12:8002;
    server 192.168.56.13:8003;
}
//如果出现通过代理访问会影响后端节点接收状态均衡
Nginx负载均衡url_hash具体配置
upstream load_pass {
    hash $request_uri;
    server 192.168.56.11:8001;
    server 192.168.56.12:8002;
    server 192.168.56.13:8003;
}

//针对三台服务器添加相同文件
/soft/code1/url1.html url2.html url3.html
/soft/code2/url1.html url2.html url3.html
/soft/code3/url1.html url2.html url3.html
Nginx负载均衡TCP配置
Nginx四层代理仅能存在于main段
stream {
        upstream ssh_proxy {
                hash $remote_addr consistent;
                server 192.168.56.103:22;
        }
        upstream mysql_proxy {
                hash $remote_addr consistent;
                server 192.168.56.103:3306;
        }
    server {
        listen 6666;
        proxy_connect_timeout 1s;
        proxy_timeout 300s;
        proxy_pass ssh_proxy;
    }
    server {
        listen 5555;
        proxy_connect_timeout 1s;
        proxy_timeout 300s;
        proxy_pass mysql_proxy;
    }
}
Nginx动静分离
动静分离,通过中间件将动态请求和静态请求进行分离, 分离资源, 减少不必要的请求消耗, 减少请求延时。 好处: 动静分离后, 即使动态服务不可用, 但静态资源不会受到影响
通过中间件将动态请求和静态请求分离
Nginx动静分离应用案例
环境准备
| 系统 | 服务 | 地址 |
|---|---|---|
| CentOS7.4 | proxy | 192.168.69.112 |
| CentOS7.4 | Nginx | 192.168.69.113 |
| CentOS7.4 | TOmcat | 192.168.69.113 |
1.在192.168.69.113静态资源
[root@Nginx conf.d]# cat access.conf
server{
        listen 80;
        root /soft/code;
        index index.html;

        location ~ .*\.(png|jpg|gif)$ {
                gzip on;
                root /soft/code/images;
        }
}

//准备目录, 以及静态相关图片
[root@Nginx ~]# wget -O /soft/code/images/nginx.png http://nginx.org/nginx.png2.在192.168.69.113准备动态资源
[root@Nginx ~]# wget -O /soft/package/tomcat9.tar.gz \
http://mirror.bit.edu.cn/apache/tomcat/tomcat-9/v9.0.7/bin/apache-tomcat-9.0.7.tar.gz
[root@Nginx ~]# mkdir /soft/app
[root@Nginx ~]# tar xf /soft/package/tomcat9.tar.gz -C /soft/app/

[root@Nginx ~]# vim /soft/app/apache-tomcat-9.0.7/webapps/ROOT/java_test.jsp
<%@ page language="java" import="java.util.*" pageEncoding="utf-8"%>
<HTML>
    <HEAD>
        <TITLE>JSP Test Page</TITLE>
    </HEAD>
    <BODY>
      <%
        Random rand = new Random();
        out.println("<h1>Random number:</h1>");
        out.println(rand.nextInt(99)+100);
      %>
    </BODY>
</HTML>4.在192.168.69.112配置负载均衡代理调度, 实现访问jsp和png
upstream static {
        server 192.168.69.113:80;
}

upstream java {
        server 192.168.69.113:8080;
}

server {
        listen 80;
        server_name 192.168.69.112;

        location / {
                root /soft/code;
                index index.html;
        }

        location ~ .*\.(png|jpg|gif)$ {
                proxy_pass http://static;
                include proxy_params;
        }

        location  ~ .*\.jsp$ {
                proxy_pass  http://java;
                include proxy_params;
        }

}3.在192.168.69.112 proxy代理上编写动静整合html文件
[root@Nginx ~]# cat /soft/code/mysite.html
<html lang="en">
<head>
        <meta charset="UTF-8" />
        <title>测试ajax和跨域访问</title>
        <script src="http://libs.baidu.com/jquery/2.1.4/jquery.min.js"></script>
</head>
<script type="text/javascript">
$(document).ready(function(){
        $.ajax({
        type: "GET",
        url: "http://192.168.69.112/java_test.jsp",
        success: function(data) {
                $("#get_data").html(data)
        },
        error: function() {
                alert("fail!!,请刷新再试!");
        }
        });
});
</script>
        <body>
                <h1>测试动静分离</h1>
                <img src="http://192.168.69.112/nginx.png">
                <div id="get_data"></div>
        </body>
</html>
测试动静分离整合
当停止Nginx后, 强制刷新页面会发现静态内容无法访问, 动态内容依旧运行正常
当停止tomcat后, 静态内容依旧能正常访问, 动态内容将不会被请求到
Nginx手机电脑应用案例
根据不同的浏览器, 以及不同的手机, 访问的效果都将不一样。
// 通过浏览器来分别连接不同的浏览器访问不同的效果。
http {
...
    upstream firefox {
        server 172.31.57.133:80;
    }
    upstream chrome {
        server 172.31.57.133:8080;
    }
    upstream iphone {
        server 172.31.57.134:8080;
    }
    upstream android {
        server 172.31.57.134:8081;
    }
    upstream default {
        server 172.31.57.134:80;
    }
...
}

// server根据判断来访问不同的页面
server {
    listen       80;
    server_name  www.xuliangwei.com;

    # safari浏览器访问的效果
    location / {
        if ($http_user_agent ~* "Safari"){
        proxy_pass http://dynamic_pools;
        }
    # firefox浏览器访问效果
        if ($http_user_agent ~* "Firefox"){
        proxy_pass http://static_pools;
        }
    # chrome浏览器访问效果
        if ($http_user_agent ~* "Chrome"){
        proxy_pass http://chrome;
        }

    # iphone手机访问效果
        if ($http_user_agent ~* "iphone"){
        proxy_pass http://iphone;
        }

    # android手机访问效果
        if ($http_user_agent ~* "android"){
        proxy_pass http://and;
        }

    # 其他浏览器访问默认规则
        proxy_pass http://dynamic_pools;
        include proxy.conf;
        }
    }
}
根据访问不同目录, 代理不同的服务器
//默认动态,静态直接找设置的static,上传找upload
    upstream static_pools {
        server 10.0.0.9:80  weight=1;
    }
   upstream upload_pools {
         server 10.0.0.10:80  weight=1;
    }
   upstream default_pools {
         server 10.0.0.9:8080  weight=1;
   }

    server {
        listen       80;
        server_name  www.xuliangwei.com;

#url: https://www.xuliangwei.com/
    location / {
        proxy_pass http://default_pools;
        include proxy.conf;
    }

#url: https://www.xuliangwei.com/static/
    location /static/ {
        proxy_pass http://static_pools;
        include proxy.conf;
    }

#url: https://www.xuliangwei.com/upload/
    location /upload/ {
        proxy_pass http://upload_pools;
        include proxy.conf;
    }
}

//方案2:以if语句实现。
if ($request_uri   ~*   "^/static/(.*)$")
{
        proxy_pass http://static_pools/$1;
}
if ($request_uri   ~*   "^/upload/(.*)$")
{
        proxy_pass http://upload_pools/$1;
}
location / {
    proxy_pass http://default_pools;
    include proxy.conf;
}
Nginx缓存服务器
通常情况下缓存是用来减少后端压力, 将压力尽可能的往前推, 减少后端压力,提高网站并发延时
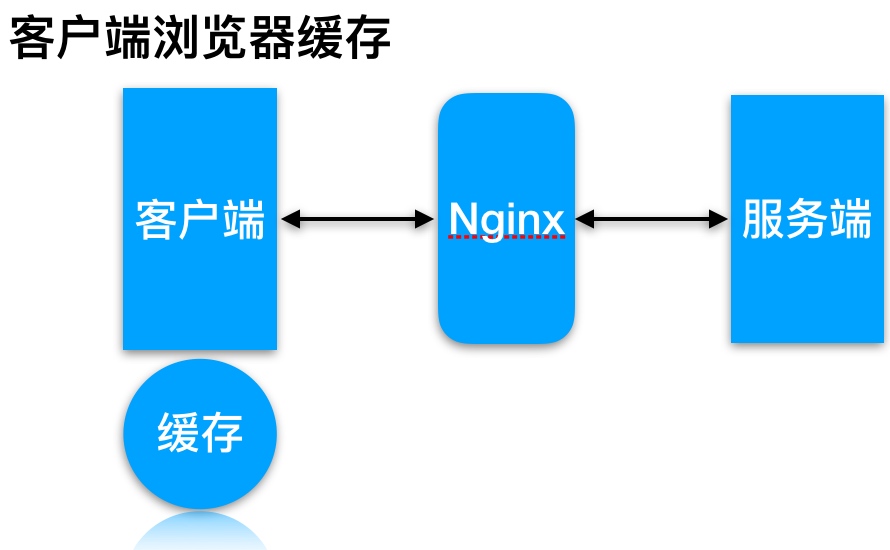
缓存常见类型
服务端缓存
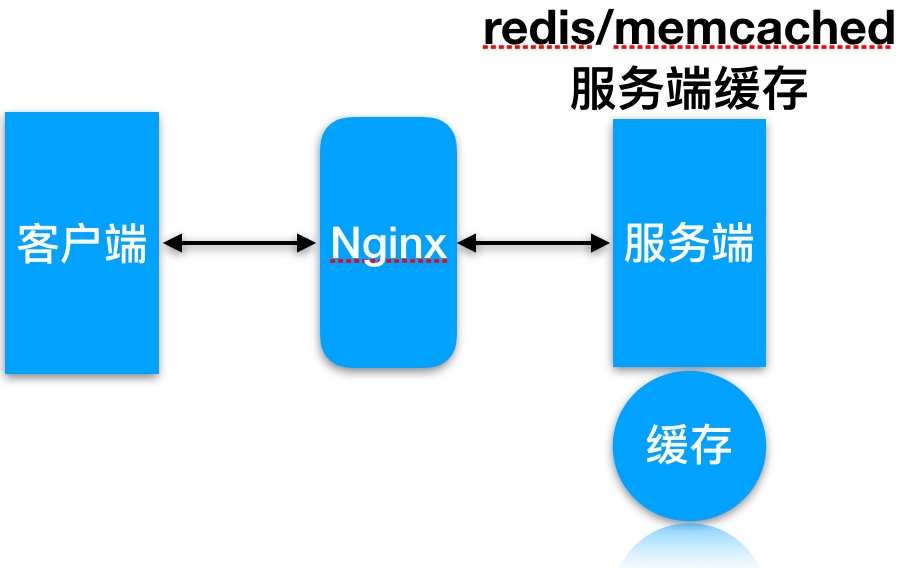
代理缓存, 获取服务端内容进行缓存

客户端浏览器缓存
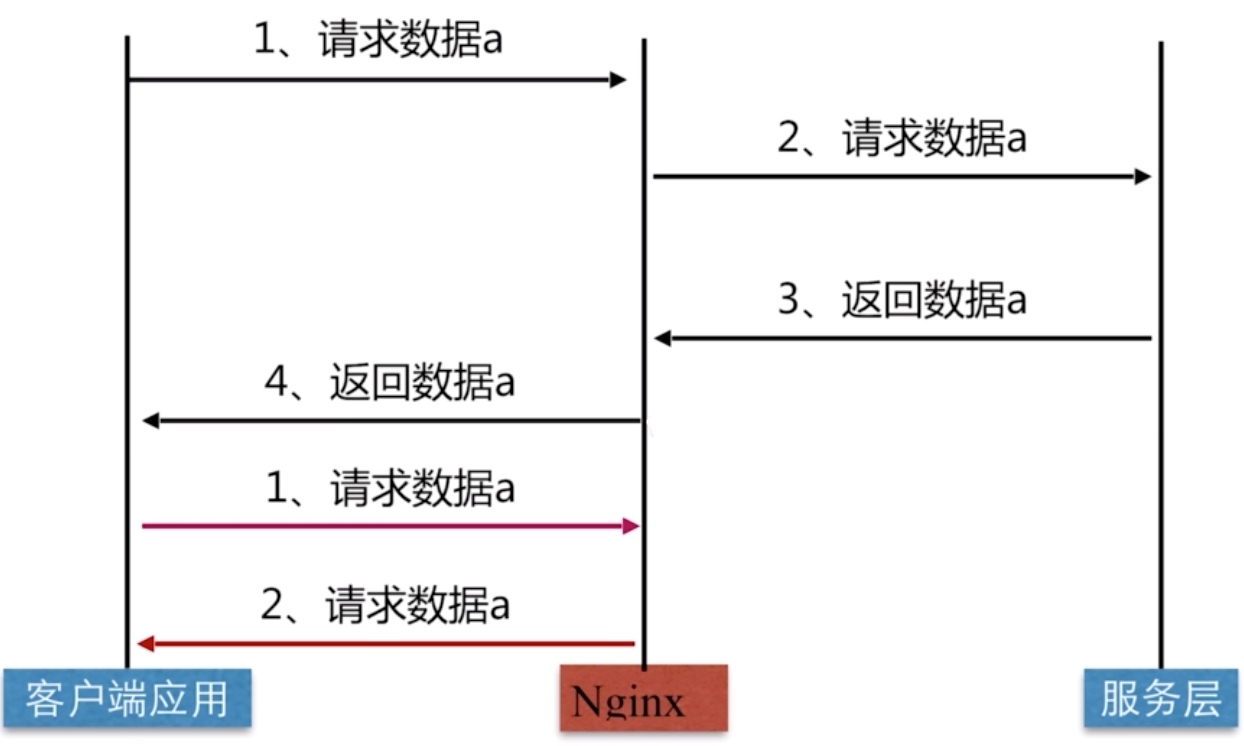
Nginx代理缓存原理
缓存配置语法
proxy_cache配置语法
Syntax: proxy_cache zone | off;
Default: proxy_cache off;
Context: http, server, location

//缓存路径
Syntax: proxy_cache_path path [levels=levels]
[use_temp_path=on|off] keys_zone=name:size [inactive=time]
[max_size=size] [manager_files=number] [manager_sleep=time][manager_threshold=time]
[loader_files=number] [loader_sleep=time] [loader_threshold=time] [purger=on|off]
[purger_files=number] [purger_sleep=time] [purger_threshold=time];
Default: —
Context: http
缓存过期周期
Syntax: proxy_cache_valid [code ...] time;
Default: —
Context: http, server, location

//示例
proxy_cache_valid 200 302 10m;
proxy_cache_valid 404   1m;
缓存的维度
Syntax: proxy_cache_key string;
Default:    proxy_cache_key $scheme$proxy_host$request_uri;
Context: http, server, location

//示例
proxy_cache_key "$host$request_uri $cookie_user";
proxy_cache_key $scheme$proxy_host$uri$is_args$args;
缓存配置实践
1.缓存准备
| 系统 | 服务 | 地址 |
|---|---|---|
| CentOS7.4 | Nginx Proxy | 192.168.69.112 |
| CentOS7.4 | Nginx Web | 192.168.69.113 |
2.web节点准备
//建立相关目录
[root@nginx ~]# mkdir -p /soft/code{1..3}
//建立相关html文件
[root@nginx ~]# for i in {1..3};do echo Code1-Url$i > /soft/code1/url$i.html;done
[root@nginx ~]# for i in {1..3};do echo Code2-Url$i > /soft/code2/url$i.html;done
[root@nginx ~]# for i in {1..3};do echo Code3-Url$i > /soft/code3/url$i.html;done

//配置Nginx
[root@nginx ~]# cat /etc/nginx/conf.d/web_node.conf
server {
        listen 8081;
        root /soft/code1;
        index index.html;
}
server {
        listen 8082;
        root /soft/code2;
        index index.html;
}
server {
        listen 8083;
        root /soft/code3;
        index index.html;
}

//检查监听端口
[root@nginx ~]# netstat -lntp|grep 80
tcp        0      0 0.0.0.0:8081            0.0.0.0:*               LISTEN      50922/nginx: master
tcp        0      0 0.0.0.0:8082            0.0.0.0:*               LISTEN      50922/nginx: master
tcp        0      0 0.0.0.0:8083            0.0.0.0:*               LISTEN      50922/nginx: master
2.代理配置缓存
[root@proxy ~]# mkdir /soft/cache
[root@proxy ~]# cat /etc/nginx/conf.d/proxy_cache.conf
upstream cache {
    server 192.168.69.113:8081;
    server 192.168.69.113:8082;
    server 192.168.69.113:8083;
}

#proxy_cache存放缓存临时文件
#levels     按照两层目录分级
#keys_zone  开辟空间名, 10m:开辟空间大小, 1m可存放8000key
#max_size   控制最大大小, 超过后Nginx会启用淘汰规则
#inactive   60分钟没有被访问缓存会被清理
#use_temp_path  临时文件, 会影响性能, 建议关闭
proxy_cache_path /soft/cache levels=1:2 keys_zone=code_cache:10m max_size=10g inactive=60m use_temp_path=off;

server {
        listen 80;
        server_name 192.168.69.12;

#proxy_cache        开启缓存
#proxy_cache_valid  状态码200|304的过期为12h, 其余状态码10分钟过期
#proxy_cache_key    缓存key
#add_header         增加头信息, 观察客户端respoce是否命中
#proxy_next_upstream 出现502-504或错误, 会跳过此台服务器访问下台
        location / {
                proxy_pass http://cache;
                proxy_cache code_cache;
                proxy_cache_valid 200 304 12h;
                proxy_cache_valid any 10m;
                add_header Nginx-Cache "$upstream_cache_status";
                proxy_next_upstream error timeout invalid_header http_500 http_502 http_503  http_504;
                include proxy_params;
        }
}
3.客户端测试
//
[root@nginx ~]# curl -s -I http://192.168.56.11/url3.html|grep "Nginx-Cache"
Nginx-Cache: MISS

//命中
[root@nginx ~]# curl -s -I http://192.168.56.11/url3.html|grep "Nginx-Cache"
Nginx-Cache: HIT
缓存清理实践
如何清理proxy_cache代理缓存
1.rm删除已缓存数据
[root@proxy ~]# rm -rf /soft/cache/*
[root@proxy ~]# curl -s -I http://192.168.56.11/url3.html|grep "Nginx-Cache"
Nginx-Cache: MISS1.通过ngx_cache_purge扩展模块清理, 需要编译安装Nginx
//建立对应目录
[root@proxy ~]# mkdir /soft/src
[root@proxy ~]# cd /soft/src
//下载Nginx包
[root@proxy ~]# wget http://nginx.org/download/nginx-1.12.2.tar.gz
[root@proxy ~]# tar xf nginx-1.12.2.tar.gz
//下载ngx_cache_purge
[root@proxy ~]# wget http://labs.frickle.com/files/ngx_cache_purge-2.3.tar.gz
[root@proxy ~]# tar xf ngx_cache_purge-2.3.tar.gz
//编译Nginx
[root@nginx src]# cd nginx-1.12.2/ && ./configure \
--prefix=/server/nginx --add-module=../ngx_cache_purge-2.3 \
--with-http_stub_status_module --with-http_ssl_module
[root@nginx src]# make && make install
//需要将上文的缓存proxy_cache.conf文件拷贝至源码包中, 并增加如下内容
location ~ /purge(/.*) {
allow 127.0.0.1;
allow 192.168.69.0/24;
deny all;
proxy_cache_purge code_cache $host$1$is_args$args;
}
//检测配置重新加载
[root@nginx conf.d]# /server/nginx/sbin/nginx -t
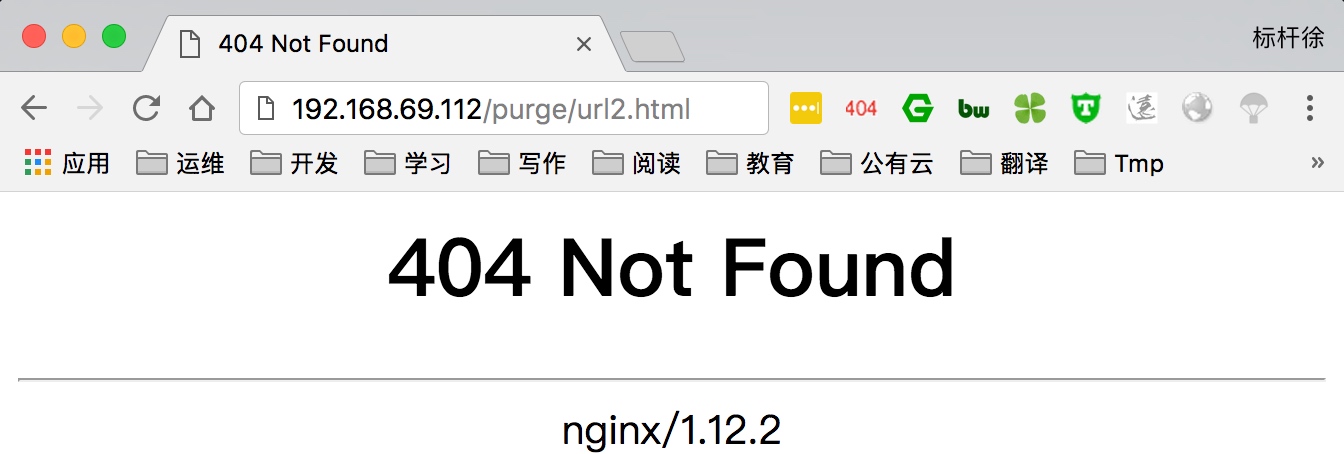
[root@nginx conf.d]# /server/nginx/sbin/nginx -s reload使用浏览器访问建立缓存

通过purge请求对应的缓存数据
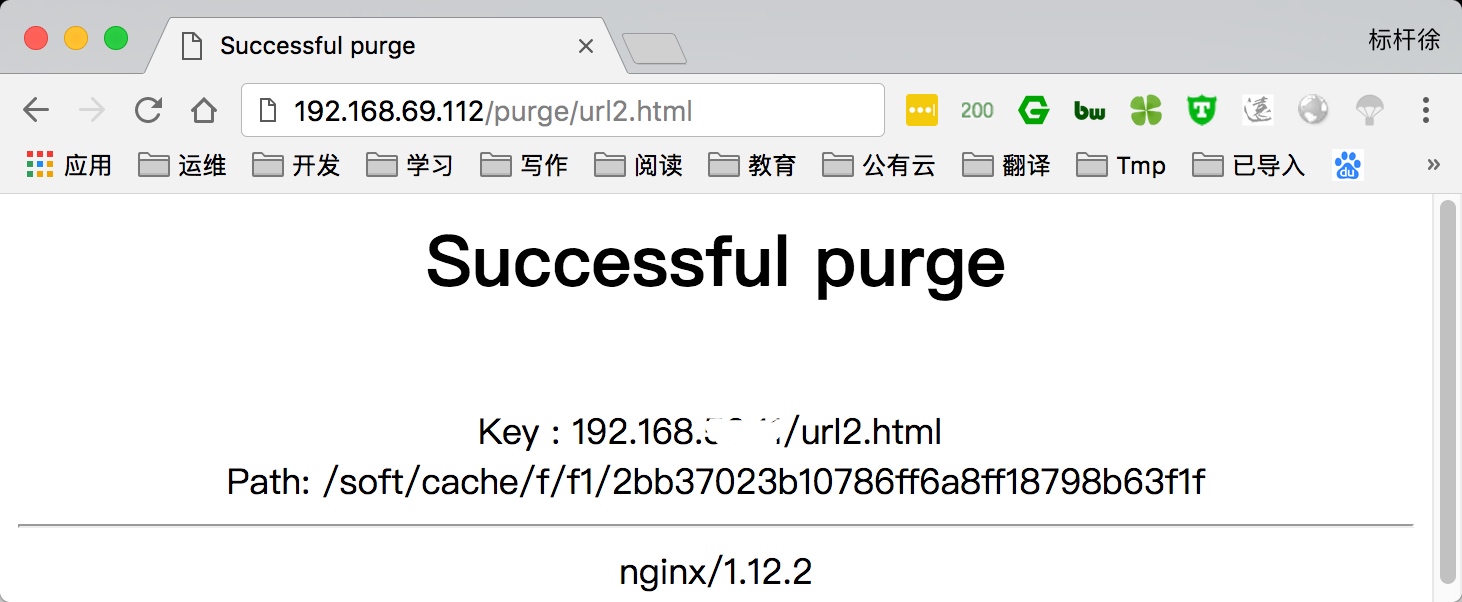
再次刷新就会404因为缓存内容已清理
部分页面不缓存
指定部分页面不进行proxy_Cache缓存
 cat proxy_cache.conf
upstream cache{
        server 192.168.69.113:8081;
        server 192.168.69.113:8082;
        server 192.168.69.113:8083;
}

proxy_cache_path /soft/cache levels=1:2 keys_zone=code_cache:10m max_size=10g inactive=60m use_temp_path=off;

server {
        listen 80;
        server_name 192.168.69.112;
        if ($request_uri ~ ^/(url3|login|register|password)) {
                set $cookie_nocache 1;
        }

        location / {
                proxy_pass http://cache;
                proxy_cache code_cache;
                proxy_cache_valid 200 304 12h;
                proxy_cache_valid any 10m;
                proxy_cache_key $host$uri$is_args$args;
                'proxy_no_cache $cookie_nocache $arg_nocache $arg_comment;
                proxy_no_cache $http_pargma $http_authorization;'
                add_header Nginx-Cache "$upstream_cache_status";
                proxy_next_upstream error timeout invalid_header http_500 http_502 http_503  http_504;
                include proxy_params;
        }
}

//清理缓存
[root@nginx ~]# rm -rf /soft/cache/*

//请求测试
[root@nginx ~]# curl -s -I http://192.168.69.112/url3.html|grep "Nginx-Cache"
Nginx-Cache: MISS
[root@nginx ~]# curl -s -I http://192.168.69.112/url3.html|grep "Nginx-Cache"
Nginx-Cache: MISS
[root@nginx ~]# curl -s -I http://192.168.69.112/url3.html|grep "Nginx-Cache"
Nginx-Cache: MISS
缓存日志记录统计
通过日志记录proxy_cache命中情况与对应url
//修改/etc/nginx/nginx.conf中log_format格式
log_format  main  '$http_user_agent' '$request_uri' '$remote_addr - $remote_user [$time_local] "$request" '
                      '$status $body_bytes_sent "$http_referer" '
                      '"$http_user_agent" "$http_x_forwarded_for"' '"$upstream_cache_status"';

//修改proxy_cache.conf, 在server标签新增access日志
    access_log /var/log/nginx/proxy_cache.log main;


//使用curl访问, 最后检查日志命令情况
curl/7.29.0/url3.html192.168.56.183 - - [19/Apr/2018:11:48:43 -0400] "HEAD /url3.html HTTP/1.1" 200 0 "-" "curl/7.29.0" "-""MISS"
curl/7.29.0/url2.html192.168.56.183 - - [19/Apr/2018:11:48:45 -0400] "HEAD /url2.html HTTP/1.1" 200 0 "-" "curl/7.29.0" "-""HIT"
curl/7.29.0/url2.html192.168.56.183 - - [19/Apr/2018:11:48:46 -0400] "HEAD /url2.html HTTP/1.1" 200 0 "-" "curl/7.29.0" "-""HIT"
Nginx安全服务
HTTPS基本概述
为什么需要使用HTTPS, 因为HTTP不安全
1.传输数据被中间人盗用, 信息泄露 2.数据内容劫持, 篡改
HTTPS配置语法
Syntax: ssl on | off;
Default: ssl off;
Context: http, server

Syntax: ssl_certificate file;
Default: —
Context: http, server

Syntax: ssl_certificate_key file;
Default: —
Context: http, server
HTTPS配置场景
配置苹果要求的证书
1.服务器所有连接使用TLS1.2以上版本(openssl 1.0.2) 2.HTTPS证书必须使用SHA256以上哈希算法签名 3.HTTPS证书必须使用RSA 2048位或ECC256位以上公钥算法 4.使用前向加密技术
秘钥生成操作步骤
1.生成key密钥 2.生成证书签名请求文件(csr文件) 3.生成证书签名文件(CA文件)
1.检查当前环境
//openssl必须是1.0.2
[root@Nginx ~]# openssl version
OpenSSL 1.0.2k-fips  26 Jan 2017

//nginx必须有ssl模块
[root@Nginx ~]# nginx -V
 --with-http_ssl_module

[root@Nginx ~]# mkdir /etc/nginx/ssl_key -p
[root@Nginx ~]# cd /etc/nginx/ssl_key
2.创建私钥
[root@Nginx ssh_key]# openssl genrsa -idea -out server.key 2048
Generating RSA private key, 2048 bit long modulus
.....+++
//记住配置密码, 我这里是1234
Enter pass phrase for server.key:
Verifying - Enter pass phrase for server.key:
3.生成使用签名请求证书和私钥生成自签证书
[root@Nginx ssl_key]# openssl req -days 36500 -x509 \
-sha256 -nodes -newkey rsa:2048 -keyout server.key -out server.crt

Country Name (2 letter code) [XX]:CN
State or Province Name (full name) []:WH
Locality Name (eg, city) [Default City]:WH
Organization Name (eg, company) [Default Company Ltd]:edu
Organizational Unit Name (eg, section) []:SA
Common Name (eg, your name or your server's hostname) []:bgx
Email Address []:[email protected]4.配置Nginx
[root@Nginx ~]# cat /etc/nginx/conf.d/ssl.conf
server {
    listen 443;
    server_name localhost;
    ssl on;
    index index.html index.htm;
    #ssl_session_cache share:SSL:10m;
    ssl_session_timeout 10m;
    ssl_certificate   ssl_key/server.crt;
    ssl_certificate_key  ssl_key/server.key;
    ssl_ciphers ECDHE-RSA-AES128-GCM-SHA256:ECDHE:ECDH:AES:HIGH:!NULL:!aNULL:!MD5:!ADH:!RC4;
    ssl_protocols TLSv1 TLSv1.1 TLSv1.2;
    ssl_prefer_server_ciphers on;

        location / {
                root /soft/code;
                access_log /logs/ssl.log main;
        }
}
5.测试访问, 由于该证书非第三方权威机构颁发,而是我们自己签发的,所以浏览器会警告
6.以上配置如果用户忘记在浏览器地址栏输入https://那么将不会跳转至https, 需要将访问http强制跳转https
[root@Nginx ~]# cat /etc/nginx/conf.d/ssl.conf
server {
    listen 443;
    server_name localhost;
    ssl on;
    index index.html index.htm;
    #ssl_session_cache share:SSL:10m;
    ssl_session_timeout 10m;
    ssl_certificate   ssl_key/server.crt;
    ssl_certificate_key  ssl_key/server.key;
    ssl_ciphers ECDHE-RSA-AES128-GCM-SHA256:ECDHE:ECDH:AES:HIGH:!NULL:!aNULL:!MD5:!ADH:!RC4;
    ssl_protocols TLSv1 TLSv1.1 TLSv1.2;
    ssl_prefer_server_ciphers on;

        location / {
                root /soft/code;
        }
}

server {
        listen 80;
        server_name localhost;
        rewrite ^(.*) https://$server_name$1 redirect;
}7.检查是否支持苹果要求ATS协议
//仅能在苹果终端上使用
$ nscurl --ats-diagnostics --verbose https://192.168.69.113
Https公有云实践
在云上签发各品牌数字证书,实现网站HTTPS化,使网站可信,防劫持、防篡改、防监听。并进行统一生命周期管理,简化证书部署,一键分发到云上产品。
上传阿里云证书, 并解压
[root@Nginx ssl_key]# rz
rz waiting to receive.
Starting zmodem transfer.  Press Ctrl+C to cancel.
Transferring 1524377920931.zip...
  100%       3 KB       3 KB/sec    00:00:01       0 Errors

//解压
[root@Nginx ssl_key]# unzip 1524377920931.zip配置nginx https
[root@Nginx conf.d]# cat ssl.nginx.bjstack.com.conf
server {
    listen 443;
    server_name nginx.bjstack.com;
    index index.html index.htm;
    ssl on;
    ssl_session_timeout 10m;
    ssl_certificate ssl_key/1524377920931.pem;
    ssl_certificate_key ssl_key/1524377920931.key;
    ssl_ciphers ECDHE-RSA-AES128-GCM-SHA256:ECDHE:ECDH:AES:HIGH:!NULL:!aNULL:!MD5:!ADH:!RC4;
    ssl_protocols TLSv1 TLSv1.1 TLSv1.2;
    ssl_prefer_server_ciphers on;

        location / {
                root /soft/code;
        }
}

server {
        listen 80;
        server_name nginx.bjstack.com;
        rewrite ^(.*) https://$server_name$1 redirect;
}Nginx限制上传大小
server {
        listen        80;
        server_name    www.S1.com;
        client_max_body_size 30M;

        location /api/ {
            proxy_pass http://127.0.0.1:8891/;
            proxy_redirect off;
            proxy_set_header Host $host;
            proxy_set_header X-Real-IP $remote_addr;
            proxy_set_header X-Forwarded-For $proxy_add_x_forwarded_for;
            proxy_send_timeout 3600s;
            proxy_read_timeout 3600s;
            proxy_connect_timeout 60s;
        }

        location / {
            root /opt/s1/www.S1.com;
            index index.html;
            add_header Access-Control-Allow-Origin *;
            try_files $uri $uri/ /index.html;
        }
    }
如果 proxy_pass的结尾有/, 则会把/api/*后面的路径直接拼接到后面,即移除api.
404页面重写
        location / {
            root   /data1/imgs;
            autoindex on;

            if ($request_uri ~* ^/all) {
                error_page 404 =200 @test;
            }

            if ($request_uri ~* ^/test) {
                error_page 404 =200 @minio;
            }

        }

        location @test {
            rewrite ^/all/(.*)$ /test/$1 permanent;
        }

        location @minio {
            rewrite ^/test/(.*)$ http://192.168.6.124:29000/test/$1 permanent;
        }
跨域配置
    add_header Access-Control-Allow-Origin *;
    add_header Access-Control-Allow-Headers x-token,Token,Keep-Alive,User-Agent,X-Requested-With,If-Modified-Since,Cache-Control,Content-Type,Authorization;
    add_header Access-Control-Allow-Methods GET,POST,OPTIONS;
Nginx 配置 WebSocket
        location ~*  ^/monitor/ws/.* {
            rewrite ^/monitor(.*)$ $1 break;
            add_header Access-Control-Allow-Origin *;
            proxy_pass http://127.0.0.1:8003;
            proxy_set_header Host $http_host;
            proxy_http_version 1.1;
            proxy_set_header Upgrade $http_upgrade;
            proxy_set_header Connection "upgrade";
        }
Nginx 进程模型
Nginx 采用的是多进程(单线程) & 多路IO复用模型。使用了 I/O 多路复用技术的 Nginx,就成了”并发事件驱动“的服务器。
Nginx的master-worker进程模型是其能够高性能的处理用户请求的原因之一,而且这里的每个worker进程都只会启动一个线程来处理用户请求。通常我们会将worker进程的数量设置得与我们的CPU数量一致,nginx也会将每个进程与每个CPU进行绑定。通过这种方式,可以充分利用操作系统多核的特性,并且能够最大限度的减少线程之间的切换而导致的资源损耗。除此之外,进程之间是相互独立的,一个 worker 进程挂了不会影响到其他 worker 进程。
配置nginx绑定CPU
刚才说nginx除外,是因为nginx提供了更精确的控制。
在conf/nginx.conf中,有如下一行:
worker_processes 1;这是用来配置nginx启动几个工作进程的,默认为1。而nginx还支持一个名为worker_cpu_affinity的配置项,也就是说,nginx可以为每个工作进程绑定CPU。我做了如下配置:
worker_processes  3;
worker_cpu_affinity 0010 0100 1000;
这里0010 0100 1000是掩码,分别代表第2、3、4颗cpu核心。
重启nginx后,3个工作进程就可以各自用各自的CPU了。
工作原理

- Nginx 在启动后,会有一个 master 进程和多个相互独立的 worker 进程。
- 接收来自外界的信号,向各worker进程发送信号,每个进程都有可能来处理这个连接。
- master 进程能监控 worker 进程的运行状态,当 worker 进程退出后(异常情况下),会自动启动新的 worker 进程。
惊群现象
主进程(master 进程)首先通过 socket() 来创建一个 sock 文件描述符用来监听,然后fork生成子进程(workers 进程),子进程将继承父进程的 sockfd(socket 文件描述符),之后子进程 accept() 后将创建已连接描述符(connected descriptor)),然后通过已连接描述符来与客户端通信。
那么,由于所有子进程都继承了父进程的 sockfd,那么当连接进来时,所有子进程都将收到通知并“争着”与它建立连接,这就叫“惊群现象”。大量的进程被激活又挂起,只有一个进程可以accept() 到这个连接,这当然会消耗系统资源。
Nginx对惊群现象的处理
Nginx 提供了一个 accept_mutex 这个东西,这是一个加在accept上的一把互斥锁。即每个 worker 进程在执行 accept 之前都需要先获取锁,获取不到就放弃执行 accept()。有了这把锁之后,同一时刻,就只会有一个进程去 accpet(),这样就不会有惊群问题了。accept_mutex 是一个可控选项,我们可以显示地关掉,默认是打开的。
worker进程工作流程
当一个 worker 进程在 accept() 这个连接之后,就开始读取请求,解析请求,处理请求,产生数据后,再返回给客户端,最后才断开连接,一个完整的请求。一个请求,完全由 worker 进程来处理,而且只能在一个 worker 进程中处理。
这样做带来的好处:
- 节省锁带来的开销。每个 worker 进程都是独立的进程,不共享资源,不需要加锁。同时在编程以及问题查上时,也会方便很多。
- 独立进程,减少风险。采用独立的进程,可以让互相之间不会影响,一个进程退出后,其它进程还在工作,服务不会中断,master 进程则很快重新启动新的 worker 进程。当然,worker 进程的也能发生意外退出。
多进程模型每个进程/线程只能处理一路IO,那么 Nginx是如何处理多路IO呢?
如果不使用 IO 多路复用,那么在一个进程中,同时只能处理一个请求,比如执行 accept(),如果没有连接过来,那么程序会阻塞在这里,直到有一个连接过来,才能继续向下执行。
而多路复用,允许我们只在事件发生时才将控制返回给程序,而其他时候内核都挂起进程,随时待命。
核心:Nginx采用的 IO多路复用模型epoll
epoll 通过在 Linux 内核中申请一个简易的文件系统(文件系统一般用什么数据结构实现?B+树),其工作流程分为三部分:
- 调用 int epoll_create(int size)建立一个epoll对象,内核会创建一个eventpoll结构体,用于存放通过epoll_ctl()向epoll对象中添加进来的事件,这些事件都会挂载在红黑树中。
- 调用 int epoll_ctl(int epfd, int op, int fd, struct epoll_event *event) 在 epoll 对象中为 fd 注册事件,所有添加到epoll中的事件都会与设备驱动程序建立回调关系,也就是说,当相应的事件发生时会调用这个sockfd的回调方法,将sockfd添加到eventpoll 中的双链表。
- 调用 int epoll_wait(int epfd, struct epoll_event * events, int maxevents, int timeout) 来等待事件的发生,timeout 为 -1 时,该调用会阻塞直到有事件发生
这样,注册好事件之后,只要有 fd 上事件发生,epoll_wait() 就能检测到并返回给用户,用户就能”非阻塞“地进行 I/O 了。
epoll() 中内核则维护一个链表,epoll_wait 直接检查链表是不是空就知道是否有文件描述符准备好了。(epoll 与 select 相比最大的优点是不会随着 sockfd 数目增长而降低效率,使用 select() 时,内核采用轮训的方法来查看是否有fd 准备好,其中的保存 sockfd 的是类似数组的数据结构 fd_set,key 为 fd,value 为 0 或者 1。)
能达到这种效果,是因为在内核实现中 epoll 是根据每个 sockfd 上面的与设备驱动程序建立起来的回调函数实现的。那么,某个 sockfd 上的事件发生时,与它对应的回调函数就会被调用,来把这个 sockfd 加入链表,其他处于“空闲的”状态的则不会。在这点上,epoll 实现了一个”伪”AIO。但是如果绝大部分的 I/O 都是“活跃的”,每个 socket 使用率很高的话,epoll效率不一定比 select 高(可能是要维护队列复杂)。
可以看出,因为一个进程里只有一个线程,所以一个进程同时只能做一件事,但是可以通过不断地切换来“同时”处理多个请求。
例子:Nginx 会注册一个事件:“如果来自一个新客户端的连接请求到来了,再通知我”,此后只有连接请求到来,服务器才会执行 accept() 来接收请求。又比如向上游服务器(比如 PHP-FPM)转发请求,并等待请求返回时,这个处理的 worker 不会在这阻塞,它会在发送完请求后,注册一个事件:“如果缓冲区接收到数据了,告诉我一声,我再将它读进来”,于是进程就空闲下来等待事件发生。
这样,基于 多进程+epoll, Nginx 便能实现高并发。
Nginx 与 多进程模式 Apache 的比较:
事件驱动适合于I/O密集型服务,多进程或线程适合于CPU密集型服务: 1、Nginx 更主要是作为反向代理,而非Web服务器使用。其模式是事件驱动。 2、事件驱动服务器,最适合做的就是这种 I/O 密集型工作,如反向代理,它在客户端与WEB服务器之间起一个数据中转作用,纯粹是 I/O 操作,自身并不涉及到复杂计算。因为进程在一个地方进行计算时,那么这个进程就不能处理其他事件了。 3、Nginx 只需要少量进程配合事件驱动,几个进程跑 libevent,不像 Apache 多进程模型那样动辄数百的进程数。 5、Nginx 处理静态文件效果也很好,那是因为读写文件和网络通信其实都是 I/O操作,处理过程一样。
记录一些用过的 Nginx 配置。
Nginx 代理 Vue.js 静态网站
   server {
        listen       80;
        server_name     boot.serrhub.com;
        location / {
            root /opt/source/serrhub-front/dist;
            index index.html;
            add_header Access-Control-Allow-Origin *;
            try_files $uri $uri/ /index.html;
        }
    }
Nginx 代理 Hexo 静态网站
    server {
        listen       443 ssl;
        server_name  xujiyou.work www.xujiyou.work;

        ssl_certificate "/etc/nginx/conf.d/cret/xujiyou-work-nginx-1214113354/xujiyou.work_chain.crt";
        ssl_certificate_key "/etc/nginx/conf.d/cret/xujiyou-work-nginx-1214113354/xujiyou.work_key.key";
        ssl_session_timeout 5m;
        ssl_ciphers ECDHE-RSA-AES128-GCM-SHA256:ECDHE:ECDH:AES:HIGH:!NULL:!aNULL:!MD5:!ADH:!RC4;
        ssl_protocols TLSv1 TLSv1.1 TLSv1.2;
        ssl_prefer_server_ciphers on;

        location /README/index.html {
            root /opt/public/;
            index index.html;
            add_header Access-Control-Allow-Origin *;
        }

        location ^~/README/ {
            proxy_set_header Host $host;
            proxy_set_header  X-Real-IP        $remote_addr;
            proxy_set_header  X-Forwarded-For  $proxy_add_x_forwarded_for;
            proxy_set_header X-NginX-Proxy true;
            #rewrite ^/README/(.*)$ /$1 break;
            if ($request_uri ~* \.md$) {
               rewrite ^/(.*)\.md$ /$1 break;
            }
            proxy_pass http://README/;
        }

        location ~ ^/.*/resource/.*$ {
            rewrite ^/(.*)/resource/(.*)$ https://xujiyou.work/resource/$2 break;
        }

        location / {
            root /opt/public/;
            index index.html;
            add_header Access-Control-Allow-Origin *;
           # try_files $uri $uri/ /index.html;
            if ( $request_uri = "/" ) {
                rewrite "/" https://xujiyou.work/README/index.html break;
            }
        }


        error_page 404 /404.html;
            location = /40x.html {
        }

        error_page 500 502 503 504 /50x.html;
            location = /50x.html {
        }
    }
Nginx 代理 Java 服务
    server {
        listen       443 ssl;
        server_name  boot.xujiyou.work;

        ssl_certificate "/etc/nginx/conf.d/cret/boot-xujiyou-work-nginx-1216114456/boot.xujiyou.work_chain.crt";
        ssl_certificate_key "/etc/nginx/conf.d/cret/boot-xujiyou-work-nginx-1216114456/boot.xujiyou.work_key.key";
        ssl_session_timeout 5m;
        ssl_ciphers ECDHE-RSA-AES128-GCM-SHA256:ECDHE:ECDH:AES:HIGH:!NULL:!aNULL:!MD5:!ADH:!RC4;
        ssl_protocols TLSv1 TLSv1.1 TLSv1.2;
        ssl_prefer_server_ciphers on;

        location / {
            proxy_pass http://127.0.0.1:8080;
            proxy_redirect off;
            proxy_set_header Host $host;
            proxy_set_header X-Real-IP $remote_addr;
            proxy_set_header X-Forwarded-For $proxy_add_x_forwarded_for;
        }
    }
Nginx+Lua实战灰度发布与WAF
Lua脚本基础语法
Lua是一个简洁、轻量、可扩展的脚本语言
Nginx+Lua优势
充分的结合Nginx的并发处理epool优势和Lua的轻量实现简单的功能且高并发的场景 统计IP 统计用户信息 安全WAF
1.安装lua
[root@Nginx-Lua ~]# yum install lua -y2.lua的运行方式
//命令行执行, 交互式
[root@Nginx-Lua ~]# lua
Lua 5.1.4  Copyright (C) 1994-2008 Lua.org, PUC-Rio
> print("Hello,World")
Hello,World

//文件执行方式, 非交互式
[root@Nginx-Lua ~]# cat test.lua
#!/usr/bin/lua
print("Hi is Bgx!")

[root@Nginx-Lua ~]# lua ./test.lua
Hi is Bgx!
3.Lua的注释语法
// --行注释
#!/usr/bin/lua
--print("Hi is Bgx!")

//块注释
--[[
    注释代码
--]]
4.Lua的基础语法
变量定义
a = 123

//布尔类型只有mil和false
//数字0,空字符串都是true
//lua中的变量如果没有特殊说明, 全是全局变量while循环语句
[root@nginx ~]# cat while.lua
#!/usr/bin/lua
sum =0
num =1
while num <= 100 do
    sum = sum + num
    num = num + 1
end
print("sum=",sum)
//执行结果
[root@nginx ~]# lua while.lua
sum=    5050

//Lua没有++或是+=这样的操作for循环语句
[root@nginx ~]# cat for.lua
#!/usr/bin/lua
sum = 0
for i = 1,100 do
        sum = sum + 1
end
print("sum=", sum)
//执行结果
[root@nginx ~]# lua for.lua
sum= 100if判断语句
[root@nginx ~]# cat if.lua
#!/usr/bin/lua
if age == 40 and sex == "Man" then
    print("男人大于40")
    elseif age > 60 and sex ~= "Woman" then
    print("非女人而且大于60")
    else
    local age = io.read()
    print("Your age is",age)
    end

//~=是不等于
//字符串的拼接操作符".."
//io库的分别从stdin和stdout读写,read和write函数
Nginx加载Lua环境
默认情况下Nginx不支持Lua模块, 需要安装LuaJIT解释器, 并且需要重新编译Nginx, 建议使用openrestry
LuaJIT Ngx_devel_kit和lua-nginx-module
1.环境准备
[root@nginx ~]# yum -y install gcc gcc-c++ make pcre-devel zlib-devel openssl-devel2.下载最新的luajit和ngx_devel_kit以及lua-nginx-module
[root@nginx ~]# mkdir -p /soft/src && cd /soft/src
[root@nginx ~]# wget http://luajit.org/download/LuaJIT-2.0.4.tar.gz
[root@nginx ~]# wget https://github.com/simpl/ngx_devel_kit/archive/v0.2.19.tar.gz
[root@nginx ~]# wget https://github.com/openresty/lua-nginx-module/archive/v0.10.13.tar.gz3.解压ngx_devel_kit和lua-nginx-module
//解压后为ngx_devel_kit-0.2.19
[root@nginx ~]# tar xf v0.2.19.tar.gz
//解压后为lua-nginx-module-0.9.16
[root@nginx ~]# tar xf v0.10.13.tar.gz4.安装LuaJIT Luajit是Lua即时编译器。
[root@nginx ~]# tar zxvf LuaJIT-2.0.3.tar.gz
[root@nginx ~]# cd LuaJIT-2.0.3
[root@nginx ~]# make && make install5.安装Nginx并加载模块
[root@nginx ~]# cd /soft/src
[root@nginx ~]# wget http://nginx.org/download/nginx-1.12.2.tar.gz
[root@nginx ~]# tar xf nginx-1.12.2.tar.gz
[root@nginx ~]# cd nginx-1.12.2
./configure --prefix=/etc/nginx --with-http_ssl_module \
--with-http_stub_status_module --with-http_dav_module \
--add-module=../ngx_devel_kit-0.2.19/ \
--add-module=../lua-nginx-module-0.10.13
[root@nginx ~]# make -j2 && make install

//建立软链接, 不建立会出现share object错误
ln -s /usr/local/lib/libluajit-5.1.so.2 /lib64/libluajit-5.1.so.2

//4.加载lua库,加入到ld.so.conf文件
echo "/usr/local/LuaJIT/lib" >> /etc/ld.so.conf
ldconfig也可以直接部署春哥的开源项目OpenResty
//安装依赖包
# yum install -y readline-devel pcre-devel openssl-devel
# cd /soft/src
下载并编译安装openresty
# wget https://openresty.org/download/ngx_openresty-1.9.3.2.tar.gz
# tar zxf ngx_openresty-1.9.3.2.tar.gz
# cd ngx_openresty-1.9.3.2
# ./configure --prefix=/soft/openresty-1.9.3.2 \
--with-luajit --with-http_stub_status_module \
--with-pcre --with-pcre-jit
# gmake && gmake install
# ln -s /soft/openresty-1.9.3.2/ /soft/openresty

//测试openresty安装
# vim /soft/openresty/nginx/conf/nginx.conf
server {
    location /hello {
            default_type text/html;
            content_by_lua_block {
                ngx.say("HelloWorld")
            }
        }
}
Nginx调用Lua指令
Nginx调用Lua模块指令, Nginx的可插拔模块加载执行, 共11个处理阶段
| 语法 | |
|---|---|
| set_by_lua set_by_lua_file | 设置Nginx变量,可以实现负载的赋值逻辑 |
| access_by_lua access_by_lua_file | 请求访问阶段处理, 用于访问控制 |
| content_by_lua content_by_lua_file | 内容处理器, 接受请求处理并输出响应 |
Nginx调用Lua API
| 变量 | |
|---|---|
| ngx.var | nginx变量 |
| ngx.req.get_headers | 获取请求头 |
| ngx.req.get_uri_args | 获取url请求参数 |
| ngx.redirect | 重定向 |
| ngx.print | 输出响应内容体 |
| ngx.say | 输出响应内容体,最后输出一个换行符 |
| ngx.header | 输出响应头 |
Nginx+Lua实现代码灰度发布
使用Nginx结合lua实现代码灰度发布
按照一定的关系区别,分不分的代码进行上线,使代码的发布能平滑过渡上线
1.用户的信息cookie等信息区别 2.根据用户的ip地址, 颗粒度更广
实践架构图
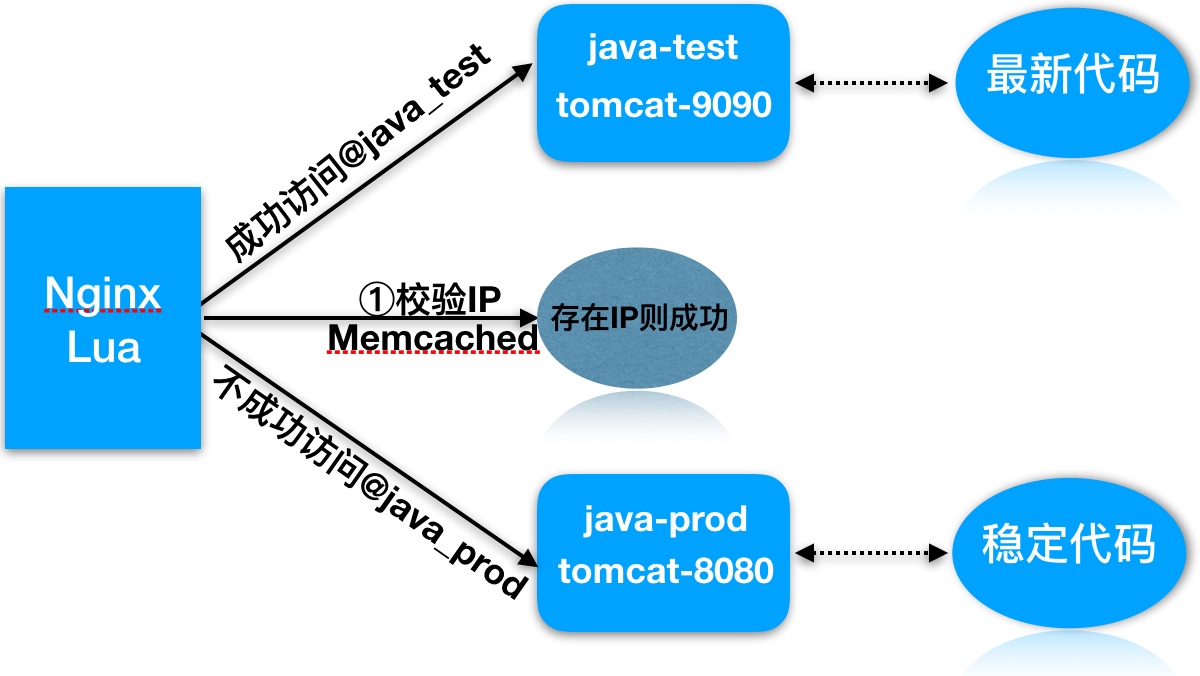
执行过程:
- 1.用户请求到达前端代理Nginx, 内嵌的lua模块会解析Nginx配置文件中Lua脚本
- 2.Lua脚本会获取客户端IP地址,查看Memcached缓存中是否存在该键值
- 3.如果存在则执行@java_test,否则执行@java_prod
- 4.如果是@java_test, 那么location会将请求转发至新版代码的集群组
- 5.如果是@java_prod, 那么location会将请求转发至原始版代码集群组
- 6.最后整个过程执行后结束
实践环境准备:
| 系统 | 服务 | 地址 |
|---|---|---|
| CentOS7 | Nginx+Lua+Memached | 192.168.56.11 |
| CentOS7 | Tomcat集群8080_Prod | 192.168.56.12 |
| CentOS7 | Tomcat集群9090_Test | 192.168.56.13 |
1.安装两台服务器Tomcat,分别启动8080和9090端口
[root@tomcat-node1-20 ~]# yum install java -y
[root@tomcat-node1-20 ~]# mkdir /soft/src -p
[root@tomcat-node1-20 ~]# cd /soft/src
[root@nginx ~]# wget http://mirrors.tuna.tsinghua.edu.cn/apache/tomcat/tomcat-9/v9.0.7/bin/apache-tomcat-9.0.7.tar.gz
[root@tomcat-node1-20 src]# tar xf apache-tomcat-9.0.7.tar.gz  -C /soft
[root@tomcat-node1-20 soft]# cp -r apache-tomcat-9.0.7/ tomcat-8080
[root@tomcat-node1-20 bin]# /soft/tomcat-8080/bin/startup.sh


//注意tomcat默认监听在8080端口, 如果需要启动9090端口需要修改server.xml配置文件2.配置Memcached并让其支持Lua调用
//安装memcached服务
[root@Nginx-Lua ~]# yum install memcached -y

//配置memcached支持lua
[root@Nginx-Lua ~]# cd /soft/src
[root@Nginx-Lua ~]# wget https://github.com/agentzh/lua-resty-memcached/archive/v0.11.tar.gz
[root@Nginx-Lua ~]# tar xf v0.11.tar.gz
[root@Nginx-Lua ~]# cp -r lua-resty-memcached-0.11/lib/resty/memcached.lua /etc/nginx/lua/

//启动memcached
[root@Nginx-Lua ~]# systemctl start memcached
[root@Nginx-Lua ~]# systemctl enable memcached
3.配置负载均衡调度
#必须在http层
lua_package_path "/etc/nginx/lua/memcached.lua";
upstream java_prod {
        server 192.168.56.12:8080;
}

upstream java_test {
        server 192.168.56.13:9090;
}

server {
        listen 80;
        server_name 47.104.250.169;


        location /hello {
                default_type 'text/plain';
                content_by_lua 'ngx.say("hello ,lua scripts")';
        }

        location /myip {
                default_type 'text/plain';
                content_by_lua '
                        clientIP = ngx.req.get_headers()["x_forwarded_for"]
                        ngx.say("Forwarded_IP:",clientIP)
                        if clientIP == nli then
                                clientIP = ngx.var.remote_addr
                                ngx.say("Remote_IP:",clientIP)
                        end
                        ';
        }
        location / {
                default_type 'text/plain';
                content_by_lua_file /etc/nginx/lua/dep.lua;
        }
       location @java_prod {
                proxy_pass http://java_prod;
                include proxy_params;
        }

        location @java_test {
                proxy_pass http://java_test;
                include proxy_params;
        }
}


//nginx反向代理tomcat,必须配置头部信息否则返回400错误
[root@nginx-lua conf.d]# cat ../proxy_params
proxy_redirect default;
proxy_set_header Host $http_host;
proxy_set_header X-Real-IP $remote_addr;
proxy_set_header X-Forwarded-For $proxy_add_x_forwarded_for;

proxy_connect_timeout 30;
proxy_send_timeout 60;
proxy_read_timeout 60;

proxy_buffer_size 32k;
proxy_buffering on;
proxy_buffers 4 128k;
proxy_busy_buffers_size 256k;
proxy_max_temp_file_size 256k;4.编写Nginx调用灰度发布Lua脚本
[root@nginx ~]# cat /etc/nginx/lua/dep.lua
--获取x-real-ip
clientIP = ngx.req.get_headers()["X-Real-IP"]

--如果IP为空-取x_forwarded_for
if clientIP == nil then
    clientIP = ngx.req.get_headers()["x_forwarded_for"]
end

--如果IP为空-取remote_addr
if clientIP == nil then
     clientIP = ngx.var.remote_addr
end

--定义本地,加载memcached
    local memcached = require "resty.memcached"
--实例化对象
    local memc, err = memcached:new()
--判断连接是否存在错误
    if not memc then
        ngx.say("failed to instantiate memc: ", err)
        return
    end
--建立memcache连接
    local ok, err = memc:connect("127.0.0.1", 11211)
--无法连接往前端抛出错误信息
    if not ok then
        ngx.say("failed to connect: ", err)
        return
    end
--获取对象中的ip-存在值赋给res
    local res, flags, err = memc:get(clientIP)
--
 --ngx.say("value key: ",res,clientIP)
    if err then
        ngx.say("failed to get clientIP ", err)
        return
    end
--如果值为1则调用local-@java_test
    if res == "1" then
        ngx.exec("@java_test")
        return
    end
--否则调用local-@java_prod
        ngx.exec("@java_prod")
return5.使用Memcache set IP, 测试灰度发布
//telnet传入值
[root@nginx conf.d]# telnet 127.0.0.1 11211
# set对应IP
set 211.161.160.201 0 0 1
# 输入1
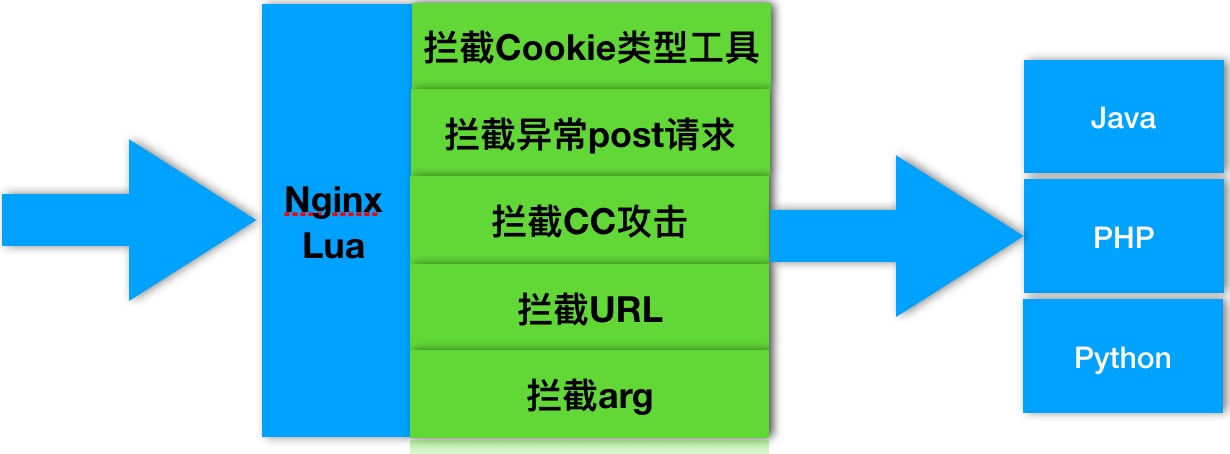
1Nginx+Lua实现WAF应用防火墙
- 1.常见的恶意行为
- 爬虫行为和恶意抓取,资源盗取
- 防护手段
- 1.基础防盗链功能不让恶意用户能够轻易的爬取网站对外数据
- access_moudle->对后台,部分用户服务的数据提供IP防护
解决方法
server {
        listen 80;
        server_name localhost;

        set $ip  0;
        if ($http_x_forward_for ~ 211.161.160.201){
        set $ip 1;
        }
        if ($remote_addr ~ 211.161.160.201){
        set $ip 1;
        }
        # 如果$ip值为0,则返回403, 否则允许访问
        location /hello {
                if ($ip = "0"){
                return 403;
                }
                default_type application/json;
                return 200 '{"status":"success"}';
}- 2.常见的攻击手段
- 后台密码撞库,通过猜测密码字典不断对后台系统登陆性尝试,获取后台登陆密码
- 防护手段
- 1.后台登陆密码复杂度
- 2.使用access_module-对后台提供IP防控
- 3.预警机制
- 文件上传漏洞,利用上传接口将恶意代码植入到服务器中,再通过url去访问执行代码
- 执行方式bgx.com/1.jpg/1.php
解决办法
location ^~ /upload {
    root /soft/code/upload;
    if ($request_filename ~* (.*)\.php){
        return 403;
    }
}- 3.常见的攻击手段
- 利用未过滤/未审核的用户输入进行Sql注入的攻击方法, 让应用运行本不应该运行的SQL代码
- 防护手段
- 1.php配置开启安全相关限制
- 2.开发人员对sql提交进行审核,屏蔽常见的注入手段
- 3.Nginx+Lua构建WAF应用层防火墙, 防止Sql注入
1.快速安装lnmp架构
[root@nginx ~]# yum install mariadb mariadb-server php php-fpm php-mysql -y2.配置Nginx + php
[root@nginx conf.d]# cat phpserver.conf
server {
        server_name 47.104.250.169;
        root /soft/code;
        index index.html index.php;


location ~ \.php$ {
    fastcgi_pass   127.0.0.1:9000;
    fastcgi_index  index.php;
    fastcgi_param  SCRIPT_FILENAME  /soft/code/$fastcgi_script_name;
    include        fastcgi_params;
        }
}3.配置MySQL
[root@nginx ~]# systemctl start mariadb

MariaDB [(none)]> create database info;
MariaDB [(none)]> use info;
MariaDB [info]> create table user(id int(11),username varchar(64), password varchar(64), email varchar(64));
MariaDB [info]> desc user;
+----------+-------------+------+-----+---------+-------+
| Field    | Type        | Null | Key | Default | Extra |
+----------+-------------+------+-----+---------+-------+
| id       | int(11)     | YES  |     | NULL    |       |
| username | varchar(64) | YES  |     | NULL    |       |
| password | varchar(64) | YES  |     | NULL    |       |
| email    | varchar(64) | YES  |     | NULL    |       |
+----------+-------------+------+-----+---------+-------+

//插入数据
MariaDB [info]> insert into user (id,username,password,email) values(1,'bgx',('123'),'[email protected]');
MariaDB [info]> select * from info.user;
+------+----------+----------------------------------+-----------------+
| id   | username | password                         | email           |
+------+----------+----------------------------------+-----------------+
|    1 | bgx      | 123                             | bgx@foxmail.com |
+------+----------+----------------------------------+-----------------+
1 row in set (0.00 sec)
5.配置php代码
[root@nginx conf.d]# cat /soft/code/login.html
<html>
<head>
        <title> Sql注入演示场景 </title>
        <meta http-equiv="content-type"content="text/html;charset=utf-8">
</head>
<body>
<form action="sql.php" method="post">
<table>
        <tr>
                <td> 用 户: </td>
                <td><input type="text" name="username"></td>
        </tr>

        <tr>
                <td> 密 码: </td>
                <td><input type="text" name="password"></td>
        </tr>
        <tr>
                <td><input type="submit" value="提交"></td>
                <td><input type="reset" value="重置"></td>
        </tr>
                </table>
        </form>
</body>
</html>

//被html调用的sql.php文件
[root@nginx conf.d]# cat /soft/code/sql.php
<?php
        $conn = mysql_connect("localhost",'root','') or die("数据库连接失败!");
        mysql_select_db("info",$conn) or die ("您选择的数据库不存在");
        $name=$_POST['username'];
        $pwd=$_POST['password'];
        $sql="select * from user where username='$name' and password='$pwd'";
        echo $sql."<br />";
        $query=mysql_query($sql);
        $arr=mysql_fetch_array($query);
        if($arr){
                echo "login success!<br />";
                echo $arr[1];
                echo $arr[3]."<br /><br />";
        }else{
                echo "login failed!";
        }
?>
5.使用lua解决此类安全问题
6.部署Waf相关防护代码
[root@nginx ~]# cd /soft/src/
[root@nginx ~]# git clone https://github.com/loveshell/ngx_lua_waf.git

//把ngx_lua_waf复制到nginx的目录下,解压命名为waf
[root@nginx ~]# cp -r ngx_lua_waf /etc/nginx/waf

//在nginx.conf的http段添加
lua_package_path "/etc/waf/?.lua";
lua_shared_dict limit 10m;
init_by_lua_file  /etc/waf/init.lua;
access_by_lua_file /etc/waf/waf.lua;

//配置config.lua里的waf规则目录(一般在waf/conf/目录下)
RulePath = "/etc/nginx/waf/wafconf/"

#绝对路径如有变动,需对应修改, 然后重启nginx即可5.Nginx + lua防止Sql注入
[root@nginx ~]# vim /etc/nginx/waf/wafconf/post
\sor\s+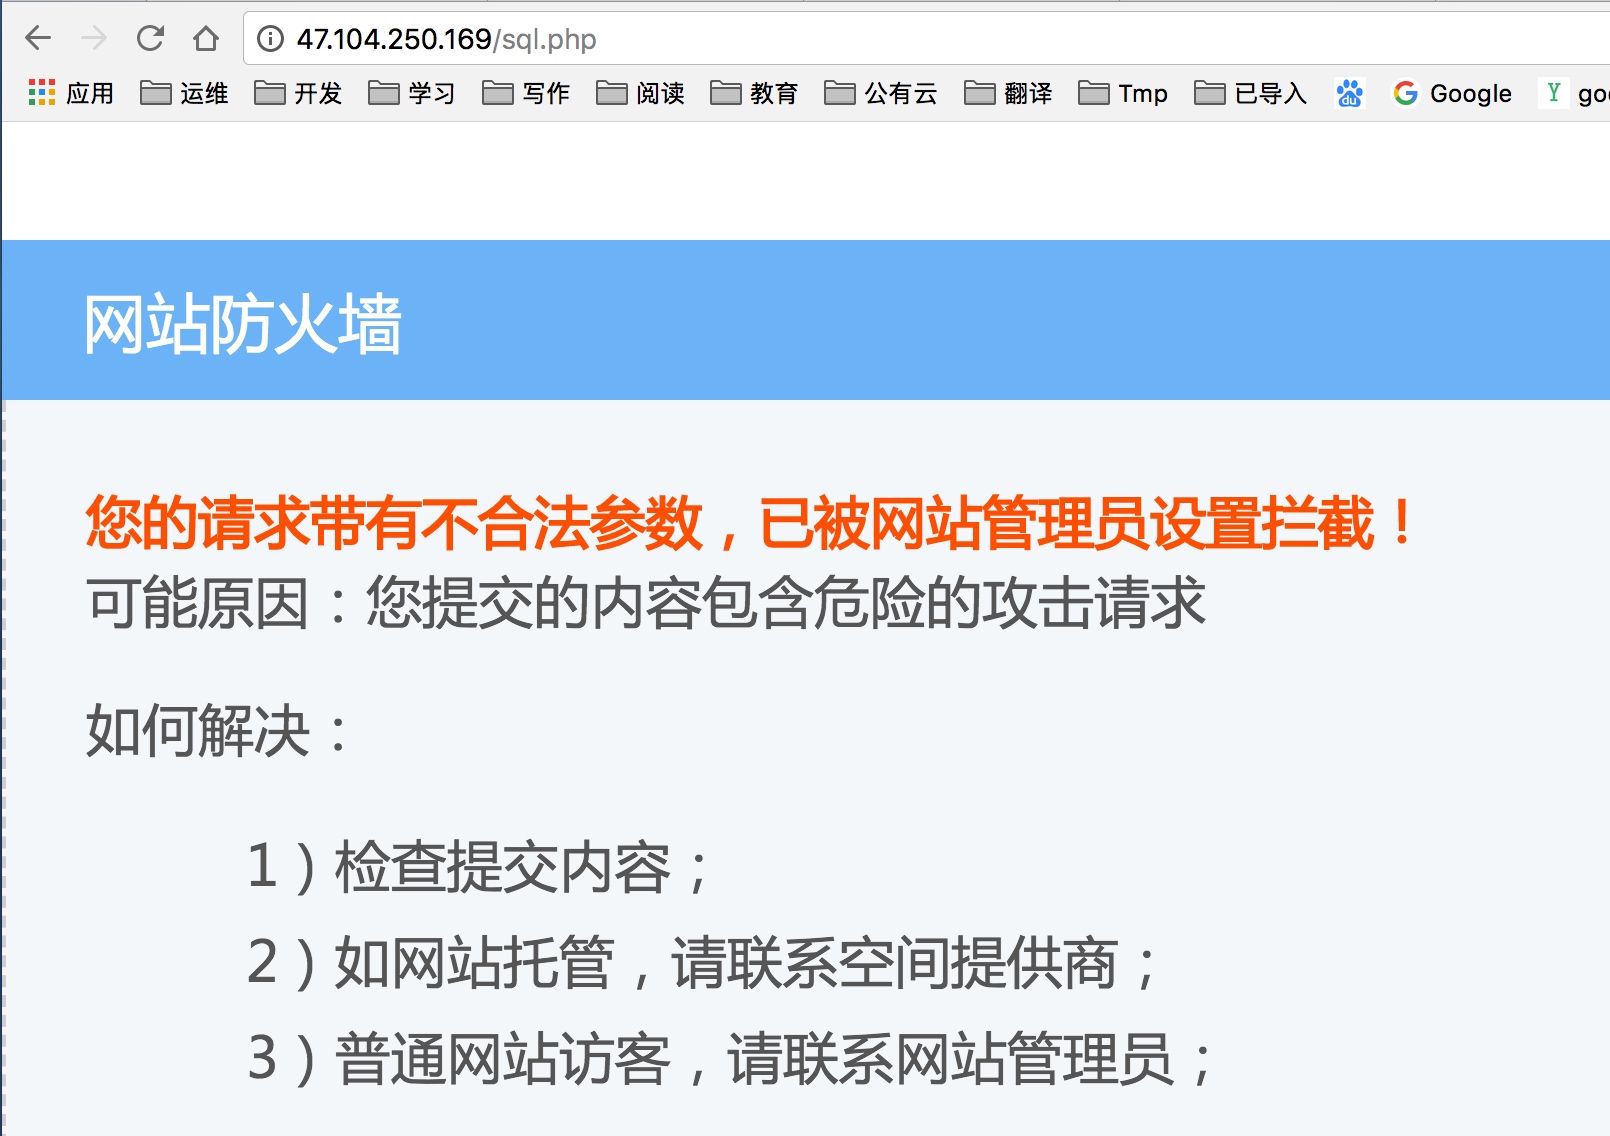
6.防止CC攻击
[root@nginx ~]# vim /etc/nginx/waf/config.lua
CCrate="100/60"
多级代理下Nginx透传真实IP
徐亮伟, 江湖人称标杆徐。多年互联网运维工作经验,曾负责过大规模集群架构自动化运维管理工作。擅长Web集群架构与自动化运维,曾负责国内某大型电商运维工作。 个人博客"徐亮伟架构师之路“累计受益数万人。 笔者Q:552408925 架构师群:471443208
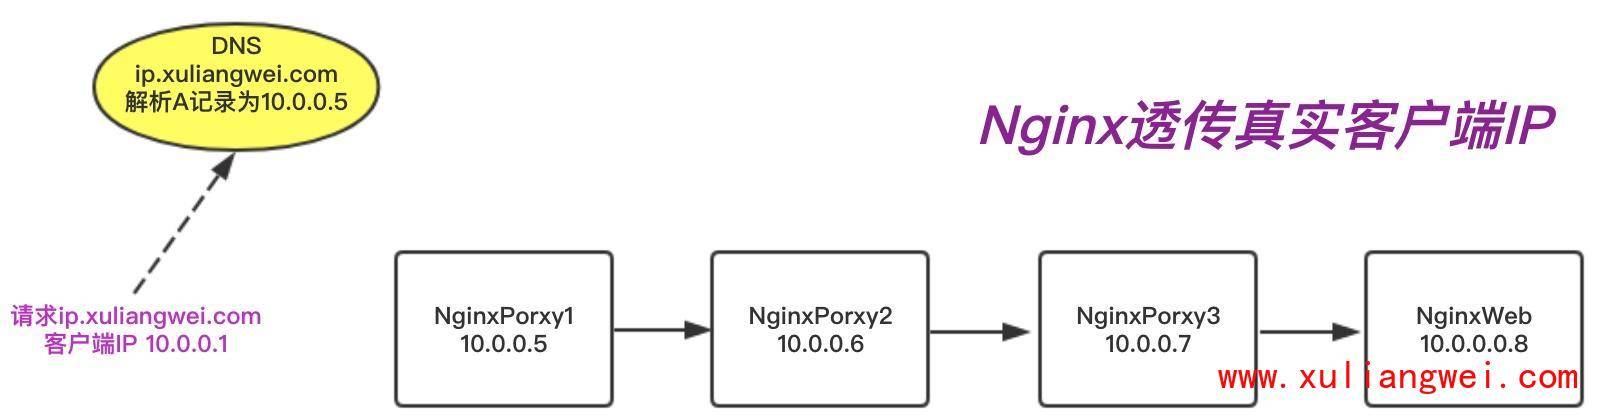
1.基于代理(七层负载均衡)情况下 透传客户端的真实IP
环境: 10.0.0.5 proxy_node1 一级代理 10.0.0.6 proxy_node2 二级代理 10.0.0.7 proxy_node3 三级代理 10.0.0.8 webserver 真实节点
域名:ip.xuliangwei.com 解析 –> 10.0.0.5
一级代理proxy_node1 Nginx配置如下:
[root@lb01 conf.d]# cat proxy_ip.xuliangwei.com.conf
server {
    listen 80;
    server_name ip.xuliangwei.com;

    location / {
        proxy_pass http://10.0.0.6;
        proxy_http_version 1.1;
        proxy_set_header Host $http_host;
        proxy_set_header X-Real-IP $remote_addr;
        proxy_set_header X-Forwarded-For $proxy_add_x_forwarded_for;
    }
}
二级代理proxy_node2 Nginx配置如下:
[root@lb01 conf.d]# cat proxy_ip.xuliangwei.com.conf
server {
    listen 80;
    server_name ip.xuliangwei.com;

    location / {
        proxy_pass http://10.0.0.7;
        proxy_http_version 1.1;
        proxy_set_header Host $http_host;
        proxy_set_header X-Real-IP $remote_addr;
        proxy_set_header X-Forwarded-For $proxy_add_x_forwarded_for;
    }
}
三级代理proxy_node3 Nginx配置如下:
[root@lb01 conf.d]# cat proxy_ip.xuliangwei.com.conf
server {
    listen 80;
    server_name ip.xuliangwei.com;

    location / {
        proxy_pass http://10.0.0.8;
        proxy_http_version 1.1;
        proxy_set_header Host $http_host;
        proxy_set_header X-Real-IP $remote_addr;
        proxy_set_header X-Forwarded-For $proxy_add_x_forwarded_for;
    }
}
WebServer Nginx配置如下:
[root@web02 conf.d]# cat ip.xuliangwei.com.conf
server {
    listen 80;
    server_name ip.xuliangwei.com;
    root /code;

    location / {
        index index.php index.html;
    }
    location ~ \.php$ {
        fastcgi_pass 127.0.0.1:9000;
        fastcgi_param SCRIPT_FILENAME $document_root$fastcgi_script_name;
        include fastcgi_params;
    }
}
测试方式一,通过如下页面获取真实IP,或查看 phpinfo() 函数中的 HTTP_X_FORWARDED_FOR
[root@web02 conf.d]# cat /code/index.php
<?php
    $ip = getenv("HTTP_X_FORWARDED_FOR");
    echo "X_FORWARDED_FOR: $ip";
?>
测试方式二,通过查看日志测试
#1.proxy_node1代理的日志
10.0.0.1 - - "GET /index.php HTTP/1.1" 200

#2.proxy_node2代理的日志
10.0.0.5 - -  "GET /index.php HTTP/1.1" 200  "10.0.0.1"

#3.proxy_node3代理的日志
10.0.0.6 - - "GET /index.php HTTP/1.1" 200 "10.0.0.1, 10.0.0.5"

#4.真实web节点的日志
10.0.0.7 - - "GET /index.php HTTP/1.1" 200 "10.0.0.1, 10.0.0.5, 10.0.0.6"
Nginx RealIP获取真实IP
使用nginx Realip_module获取多级代理下的客户端真实IP地址,在真实Web节点上配置,配置信息如下:
[root@web02 conf.d]# cat ip.xuliangwei.com.conf
server {
    listen 80;
    server_name ip.xuliangwei.com;
    root /code;
    set_real_ip_from  10.0.0.5;
    set_real_ip_from  10.0.0.6;
    set_real_ip_from  10.0.0.7;
    real_ip_header    X-Forwarded-For;
    real_ip_recursive on;
    #set_real_ip_from:真实服务器上一级代理的IP地址或者IP段,可以写多行
    #real_ip_header:从哪个header头检索出需要的IP地址
    #real_ip_recursive:递归排除set_real_ip_from里面出现的IP,其余没有出现的认为是用户真实IP


    location / {
        index index.php index.html;
    }

    location ~ \.php$ {
        fastcgi_pass 127.0.0.1:9000;
        fastcgi_param SCRIPT_FILENAME $document_root$fastcgi_script_name;
        include fastcgi_params;
    }
}
最终结果是"10.0.0.1 - - “GET /index.php HTTP/1.1” 200 “10.0.0.5, 10.0.0.6” 10.0.0.5,10.0.0.6都出现在set_real_ip_from中,仅仅10.0.0.1没出现,那么他就被认为是用户的ip地址,同时会被赋值到 $remote_addr变量中。
获取真实IP总结: forwarded-for:可以获取到用户的真实IP地址。 nginx realip:程序无需改动,直接使用remote_addr变量即可获取真实IP地址,但需要知道所有沿途经过的IP地址或IP段
Nginx性能优化
性能优化概述
在做性能优化前, 我们需要对如下进行考虑
- 1.当前系统结构瓶颈
- 观察指标
- 压力测试
- 2.了解业务模式
- 接口业务类型
- 系统层次化结构
- 3.性能与安全
- 性能好安全弱
- 安全好性能低
压力测试工具
1.安装压力测试工具ab
[root@nginx-lua ~]# yum install httpd-tools -y2.了解压测工具使用方式
[root@nginx-lua ~]# ab -n 200 -c 2 http://127.0.0.1/

//-n总的请求次数
//-c并发请求数
//-k是否开启长连接3.配置Nginx静态网站与tomcat动态网站环境
[root@nginx-lua conf.d]# cat jsp.conf
server {
        server_name localhost;
        listen 80;
        location / {
                root /soft/code;
                try_files $uri @java_page;
                index index.jsp index.html;
        }
        location @java_page{
                proxy_pass http://192.168.56.20:8080;
        }
}

//分别给Nginx准备静态网站
[root@nginx-lua ~]# cat /soft/code/bgx.html
<h1> Ab Load </h1>
//给Tomcat准备静态网站文件
[root@tomcat-node1-20 ROOT]# cat /soft/tomcat-8080/webapps/ROOT/bgx.html
<h1> Ab Load </h1>4.使用ab工具进行压力测试
//进行压力测试
[root@Nginx conf.d]# ab -n2000 -c2  http://127.0.0.1/bgx.html
...
Server Software:        nginx/1.12.2
Server Hostname:        127.0.0.1
Server Port:            80

Document Path:          /bgx.html
Document Length:        19 bytes

Concurrency Level:      200
# 总花费总时长
Time taken for tests:   1.013 seconds
# 总请求数
Complete requests:      2000
# 请求失败数
Failed requests:        0
Write errors:           0
Total transferred:      510000 bytes
HTML transferred:       38000 bytes
# 每秒多少请求/s(总请求出/总共完成的时间)
Requests per second:    9333.23 [#/sec] (mean)
# 客户端访问服务端, 单个请求所需花费的时间
Time per request:       101.315 [ms] (mean)
# 服务端处理请求的时间
Time per request:       0.507 [ms] (mean, across all concurrent requests)
# 判断网络传输速率, 观察网络是否存在瓶颈
Transfer rate: 491.58 [Kbytes/sec] received5.将nginx下的bgx文件移走, 再次压测会由tomcat进行处理
Concurrency Level:      200
Time taken for tests:   1.028 seconds
Complete requests:      2000
Failed requests:        0
Write errors:           0
Total transferred:      510000 bytes
HTML transferred:       38000 bytes
Requests per second:    1945.09 [#/sec] (mean)
Time per request:       102.823 [ms] (mean)
Time per request:       0.514 [ms] (mean, across all concurrent requests)
Transfer rate:          484.37 [Kbytes/sec] received
影响性能指标
影响性能方便整体关注
- 1.网络
- 网络的流量
- 网络是否丢包
- 这些会影响http的请求与调用
- 2.系统
- 硬件有没有磁盘损坏,磁盘速率
- 系统负载、内存、系统稳定性
- 3.服务
- 连接优化、请求优化
- 根据业务形态做对应的服务设置
- 4.程序
- 接口性能
- 处理速度
- 程序执行效率
- 5.数据库
每个架构服务与服务之间都或多或少有一些关联, 我们需要将整个架构进行分层, 找到对应系统或服务的短板, 然后进行优化
系统性能优化
- 文件句柄, Linux一切皆文件,文件句柄可以理解为就是一个索引
- 文件句柄会随着我们进程的调用频繁增加
- 系统默认对文件句柄有限制,不能让一个进程无限的调用
- 需要限制每个进程和每个服务使用多大的文件句柄
- 文件句柄是必须要调整的优化参数
- 设置方式
- 系统全局性修改
- 用户局部性修改
- 进程局部性修改
vim /etc/security/limits.conf
//针对root用户
root soft nofile 65535
root hard nofile 65535
//所有用户, 全局
* soft nofile 25535
* hard nofile 25535

//对于Nginx进程
worker_rlimit_nofile 45535;

//root用户
//soft提醒
//hard限制
//nofile文件数配置项
//65535最大大小
Nginx性能优化
CPU亲和, 减少进程之间不断频繁迁移, 减少性能损耗
1.查看当前CPU物理状态
[root@nginx ~]# lscpu |grep "CPU(s)"
CPU(s):                24
On-line CPU(s) list:   0-23
NUMA node0 CPU(s):     0,2,4,6,8,10,12,14,16,18,20,22
NUMA node1 CPU(s):     1,3,5,7,9,11,13,15,17,19,21,23

//2颗物理cpu,没颗cpu12核心, 总共24核心2.将Nginx worker进程绑到不同的核心上
//启动多少worker进程, 官方建议和cpu核心一致, 第一种绑定组合方式
#worker_processes 24;
#worker_cpu_affinity 000000000001 000000000010 000000000100 000000001000 000000010000 000000100000 000001000000 000010000000 000100000000 001000000000 010000000000 10000000000;

//第二种方式
#worker_processes 2;
#worker_cpu_affinity 101010101010 010101010101;

//最佳方式绑定方式
worker_processes auto;
worker_cpu_affinity auto;3.查看nginx worker进程绑定至对应cpu
ps -eo pid,args,psr|grep [n]ginx4.Nginx通用优化配置文件
[root@nginx ~]# cat nginx.conf
user nginx;
worker_processes auto;
worker_cpu_affinity auto;

error_log /var/log/nginx/error.log warn;
pid /run/nginx.pid;
#调整至1w以上,负荷较高建议2-3w以上
worker_rlimit_nofile 35535;

events {
    use epoll;
#限制每个进程能处理多少个连接请求,10240x16
    worker_connections 10240;
}

http {
    include             /etc/nginx/mime.types;
    default_type        application/octet-stream;
# 统一使用utf-8字符集
    charset utf-8;

    log_format  main  '$remote_addr - $remote_user [$time_local] "$request" '
                      '$status $body_bytes_sent "$http_referer" '
                      '"$http_user_agent" "$http_x_forwarded_for"';
    access_log  /var/log/nginx/access.log  main;

# Core module
    sendfile            on;
# 静态资源服务器建议打开
    tcp_nopush          on;
# 动态资源服务建议打开,需要打开keepalived
    tcp_nodelay         on;
    keepalive_timeout   65;

# Gzip module
    gzip on;
    gzip_disable "MSIE [1-6]\.";
    gzip_http_version 1.1;

# Virtal Server
    include /etc/nginx/conf.d/*.conf;
}
Nginx LNMP
安装LNMP架构
yum安装 nginx1.12 php7.2 Mriadb5.7
1.安装Nginx
//1.使用Nginx官方提供的rpm包
[root@nginx ~]# cat /etc/yum.repos.d/nginx.repo
[nginx]
name=nginx repo
baseurl=http://nginx.org/packages/centos/7/$basearch/
gpgcheck=0
enabled=1

//2.执行yum安装
[root@nginx ~]# yum install nginx -y
[root@nginx ~]# systemctl start nginx
[root@nginx ~]# systemctl enable nginx
2.使用第三方扩展epel源安装php7.2
//移除旧版php
[root@nginx ~]# yum remove php-mysql-5.4 php php-fpm php-common

//安装扩展源
[root@nginx ~]# rpm -Uvh https://dl.fedoraproject.org/pub/epel/epel-release-latest-7.noarch.rpm
[root@nginx ~]# rpm -Uvh https://mirror.webtatic.com/yum/el7/webtatic-release.rpm

//安装php72版本
[root@nginx ~]# yum -y install php72w php72w-cli php72w-common php72w-devel php72w-embedded php72w-gd php72w-mbstring php72w-pdo php72w-xml php72w-fpm php72w-mysqlnd php72w-opcache

//启动php
[root@nginx ~]# systemctl start php-fpm
[root@nginx ~]# systemctl enable php-fpm3.安装Mariadb
//下载官方扩展源, 扩展源集成mysql5.6、5.7、8.0,仅5.7仓库是开启
[root@nginx ~]# rpm -ivh http://repo.mysql.com/yum/mysql-5.7-community/el/7/x86_64/mysql57-community-release-el7-10.noarch.rpm
[root@nginx ~]# yum install mysql-community-server -y
[root@nginx ~]# systemctl start mysqld
[root@nginx ~]# systemctl enable mysqld

//如果mysql登陆需要密码,请查看该文件
[root@nginx ~]# grep 'temporary password' /var/log/mysqld.log

//登陆mysql重新配置密码
[root@nginx ~]# mysql -uroot -p'password'
mysql> ALTER USER 'root'@'localhost' IDENTIFIED BY 'MyNewPass4!';
配置LNMP架构
1.配置Nginx实现动态请求转发至php
[root@nginx ~]# cat /etc/nginx/conf.d/php.conf
server {
        server_name _;
        listen 80;
        root /soft/code;
        index index.php index.html;

        location ~ \.php$ {
                fastcgi_pass   127.0.0.1:9000;
                fastcgi_index  index.php;
                fastcgi_param  SCRIPT_FILENAME  /soft/code$fastcgi_script_name;
                include        fastcgi_params;
        }
}2.添加php测试页面
//测试phpinfo
[root@nginx ~]# cat /soft/code/info.php
<?php
        phpinfo();
?>

//使用mysqli模块测试连接mysql
[root@nginx ~]# cat /soft/code/mysqli.php
        <?php
        $servername = "localhost";
        $username = "root";
        $password = "";

        // 创建连接
        $conn = mysqli_connect($servername, $username, $password);

        // 检测连接
        if (!$conn) {
            die("Connection failed: " . mysqli_connect_error());
        }
        echo "连接成功";
        ?>

//使用pdo模块测试连接mysql
[root@nginx ~]# cat /soft/code/mysqlpdo.php
<?php
        $servername = "localhost";
        $username = "root";
        $password = "";

        try {
            $conn = new PDO("mysql:host=$servername;dbname=test", $username, $password);
            echo "连接成功";
        }
        catch(PDOException $e)
        {
            echo $e->getMessage();
        }
        ?>
检测LNMP架构
Nginx与PHP原理
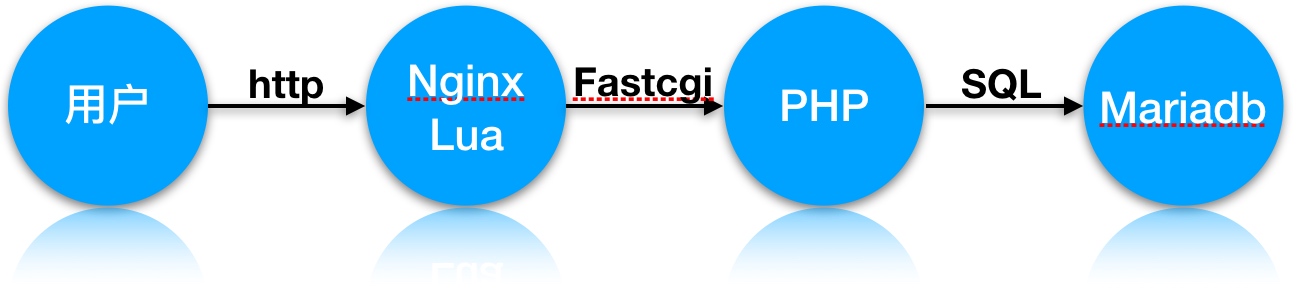
Nginx FastCGI的运行原理
nginx fastcgi访问php
1.用户发送http请求报文给nginx服务器 2.nginx会根据文件url和后缀来判断请求 3.如果请求的是静态内容,nginx会将结果直接返回给用户 4.如果请求的是动态内容,nginx会将请求交给fastcgi客户端,通过fastcgi_pass将这个请求发送给php-fpm 5.php-fpm收到请求后会通过本地监听的socket交给wrapper 6.wrapper收到请求会生成新的线程调用php动态程序解析服务器 7.如果用户请求的是博文、或者内容、PHP会请求MySQL查询结果 8.如果用户请求的是图片、附件、PHP会请求nfs存储查询结果 9.php会将查询到的结果交给Nginx 10.nginx会生成一个响应报文返还给用户
PHP配置文件优化
php-ini优化
//打开php的安全模式,控制php执行危险函数, 默认是Off,改为On
sql.safe_mode = Off
//关闭php头部信息, 隐藏版本号, 默认是On,该为Off
expose_php = On
//错误信息输出控制
display_error = Off
error_reporting = E_WARNING & E_ERROR
//记录错误日志至后台, 方便追溯
log_errors = On
error_log = /var/log/php_error.log
//每个脚本时间最大内存
memory_limit = 128M
//上传文件最大许可,默认2M, 建议调整为16,32M
upload_max_filesize = 2M
//禁止远程执行phpshell,默认On, 建议Off
allow_url_fopen = On
//时区调整,默认PRC, 建议调整为Asia/Shanghai
date.timezone = PRC


//整体优化后配置文件
sql.safe_mode = Off
expose_php = Off
display_error = Off
error_reporting = E_WARNING & E_ERROR
log_errors = On
error_log = /var/log/php_error.log
upload_max_filesize = 50M
allow_url_fopen = Off
date.timezone = Asia/Shanghai
php-fpm优化
PHP-FPM配置文件 4核16G、8核16G
[root@nginx ~]# cat /etc/php-fpm.d/www.conf
[global]
pid = /var/run/php-fpm.pid
#php-fpm程序错误日志
error_log = /var/log/php/php-fpm.log
log_level = warning
rlimit_files = 655350
events.mechanism = epoll

[www]
user = nginx
group = nginx
listen = 127.0.0.1:9000
listen.owner = www
listen.group = www
listen.mode = 0660

listen.allowed_clients = 127.0.0.1
pm = dynamic
pm.max_children = 512
pm.start_servers = 10
pm.min_spare_servers = 10
pm.max_spare_servers = 30
pm.process_idle_timeout = 15s;

pm.max_requests = 2048

#php-www模块错误日志
php_flag[display_errors] = off
php_admin_value[error_log] = /var/log/php/php-www.log
php_admin_flag[log_errors] = on

#php慢查询日志
request_slowlog_timeout = 5s
slowlog = /var/log/php/php-slow.log
PHP5-FPM配置详解释
[global]
#pid设置, 记录程序启动后pid
pid = /var/run/php-fpm.pid
#php-fpm程序启动错误日志路径
error_log = /soft/log/php/php-fpm_error.log
# 错误级别. 可用级别为: alert(必须立即处理),error(错误情况), warning(警告情况), notice(一般重要信息), debug(调试信息). 默认: notice.
log_level = warning
#设置文件打开描述符的rlimit限制.
rlimit_files = 65535
events.mechanism = epoll

#启动进程的用户和组
[www]
user = www
group = www

# fpm监听端口
listen = 127.0.0.1:9000
# unix socket设置选项,如果使用tcp方式访问,这里注释即可。
listen.owner = www
listen.group = www
# 允许访问FastCGI进程的IP,any不限制
listen.allowed_clients = 127.0.0.1

# pm设置动态调度
pm = dynamic
# 同一时刻最大的php-fpm子进程数量
pm.max_children = 200
# 动态方式下的起始php-fpm进程数量
pm.start_servers = 20
# 动态方式下服务器空闲时最小php-fpm进程数量
pm.min_spare_servers = 10
# 动态方式下服务器空闲时最大php-fpm进程数量
pm.max_spare_servers = 30
# 最大请求
pm.max_requests = 1024
pm.process_idle_timeout = 15s;

# FPM状态页面,用于监控php-fpm状态使用
pm.status_path = /status
# 错误日志
php_flag[display_errors] = off
php_admin_value[error_log] = /soft/log/php/php-www_error.log
php_admin_flag[log_errors] = on

# 配置php慢查询, 以及慢查询记录日志位置
request_slowlog_timeout = 5s
slowlog = /soft/log/php/php-slow.log
Nginx常见问题
Server优先级
Nginx多个相同Server_name优先级
1.环境准备
[root@nginx ~]# mkdir /soft/code{1..3} -p
[root@nginx ~]# for i in {1..3};do echo "<h1>Code $i</h1>" > /soft/code"$i"/index.html;done2.准备多份相同Nginx配置文件
[root@Nginx conf.d]# ll
总用量 12
-rw-r--r-- 1 root root 123 4月  19 19:08 testserver1.conf
-rw-r--r-- 1 root root 123 4月  19 19:09 testserver2.conf
-rw-r--r-- 1 root root 123 4月  19 19:09 testserver3.conf

//内容如下
[root@Nginx conf.d]# cat testserver{1..3}.conf
server {
        listen 80;
        server_name testserver1 192.168.69.113;

        location / {
                root /soft/code1;
                index index.html;
        }
}
server {
        listen 80;
        server_name testserver2 192.168.69.113;

        location / {
                root /soft/code2;
                index index.html;
        }
}
server {
        listen 80;
        server_name testserver3 192.168.69.113;

        location / {
                root /soft/code3;
                index index.html;
        }
}

//检测语法
[root@Nginx conf.d]# nginx -t
nginx: [warn] conflicting server name "192.168.69.113" on 0.0.0.0:80, ignored
nginx: [warn] conflicting server name "192.168.69.113" on 0.0.0.0:80, ignored
nginx: the configuration file /etc/nginx/nginx.conf syntax is ok
nginx: configuration file /etc/nginx/nginx.conf test is successful

//重启Nginx
[root@Nginx conf.d]# nginx -t
3.测试访问效果
[root@Nginx conf.d]# curl 192.168.69.113
<h1>Code 1</h1>
[root@Nginx conf.d]# mv testserver1.conf testserver5.conf
[root@Nginx conf.d]# nginx -s reload
[root@Nginx conf.d]# curl 192.168.69.113
<h1>Code 2</h1>
location优先级
一个server出现多个location
| 完整匹配 | 优先级高 |
|---|---|
| = | 进行普通字符精确匹配, 完全匹配 |
| ^~ | 表示普通字符匹配, 使用前缀匹配 |
| 正则匹配 | 匹配后会继续查找更精确匹配的location |
| ~ | 区分大小写匹配 |
| ~* | 不区分大小写 |
1.实例准备
[root@Nginx conf.d]# cat testserver.conf
server {
        listen 80;
        server_name 192.168.69.113;
        root /soft;
        index index.html;

        location = /code1/ {
               rewrite ^(.*)$ /code1/index.html break;
        }

        location ~ /code* {
        rewrite ^(.*)$ /code3/index.html break;
        }
        location ^~ /code {
                rewrite ^(.*)$ /code2/index.html break;
        }

}
2.测试效果
[root@Nginx conf.d]# curl http://192.168.69.113/code1/
<h1>Code 1</h1>

//注释掉精确匹配=, 重启Nginx
[root@Nginx ~]# curl http://192.168.69.113/code1/
<h1>Code 2</h1>

//注释掉^~, 重启Nginx
[root@Nginx ~]# curl http://192.168.69.113/code1/
<h1>Code 3</h1>
try_files的使用
nginx的try_files按顺序检查文件是否存在
location /{
try_files $uri $uri/ /index.php;
}

#1.检查用户请求的uri内容是否存在本地,存在则解析
#2.将请求加/, 类似于重定向处理
#3.最后交给index.php处理
1.演示环境准备
[root@Nginx ~]# echo "Try-Page" > /soft/code/index.html
[root@Nginx ~]# echo "Tomcat-Page" > /soft/app/apache-tomcat-9.0.7/webapps/ROOT/index.html

//启动tomcat
[root@Nginx ~]# sh /soft/app/apache-tomcat-9.0.7/bin/startup.sh
//检查tomcat端口
[root@Nginx ~]# netstat -lntp|grep 8080
tcp6 0 0 :::8080 :::* LISTEN 104952/java 2.配置Nginx的tryfiles
[root@Nginx ~]# cat /etc/nginx/conf.d/try.conf
server {
        listen 80;
        server_name 192.168.69.113;
        root /soft/code;
        index index.html;
        location / {
                try_files $uri @java_page;
        }
        location @java_page {
                proxy_pass http://127.0.0.1:8080;
        }
}

//重启Nginx
[root@Nginx ~]# nginx -s reload3.测试tryfiles
[root@Nginx ~]# curl http://192.168.69.113/index.html
Try-Page

//将/soft/code/index.html文件移走
[root@Nginx ~]# mv /soft/code/{index.html,index.html_bak}

//发现由Tomcat吐回了请求
[root@Nginx ~]# curl http://192.168.69.113/index.html
Tomcat-Page
alias与root区别
root路径配置
[root@Nginx ~]# mkdir /local_path/code/request_path/code/ -p
[root@Nginx ~]# echo "Root" > /local_path/code/request_path/code/index.html

//Nginx的root配置
[root@Nginx ~]# cat /etc/nginx/conf.d/root.conf
server {
        listen 80;
        index index.html;
        location /request_path/code/ {
                root /local_path/code/;
        }
}

//请求测试
[root@Nginx conf.d]# curl http://192.168.69.113/request_path/code/index.html
Root

//实际请求本地文件路径为
/local_path/code/'request_path/code'/index.htmlalias路径配置
[root@Nginx ~]# mkdir /local_path/code/request_path/code/ -p
[root@Nginx ~]# echo "Alias" > /local_path/code/index.html

//配置文件
[root@Nginx ~]# cat /etc/nginx/conf.d/alias.conf
server {
        listen 80;
        index index.html;
        location /request_path/code/ {
                alias /local_path/code/;
        }
}

//测试访问
[root@Nginx ~]# curl http://192.168.69.113/request_path/code/index.html
Alias

//实际访问本地路径
/local_path/code/'index.html'
获取用户真实IP
Nginx传递用户的真实IP地址
$remote_addr 只能获取到最近一台服务器访问IP x_forwarded_for 头部信息容易被篡改
常见HTTP状态码
200 正常请求 301 永久跳转 302 临时跳转 400 请求参数错误 401 账户密码错误(authorization required) 403 权限被拒绝(forbidden) 404 文件没找到(Not Found) 413 用户上传文件大小限制(Request Entity Too Large) 502 后端服务无响应(boy gateway) 504 后端服务执行超时(Gateway Time-out)
网站访问原理
网站相关术语 如果一栋大厦里所有工作人员通过1个IP公网接口上网, 总共100个设备, 当所有人同时请求一个网站, 并且刷新了5次, 那么请求pv、ip、uv分别是多少
pv:页面浏览量 500 uv:唯一设备100 ip:唯一出口 1
- 1.DNS流程
- 1.查询本地Hosts
- 2.请求本地localDNS
- 3.返回对应的IP
- 2.HTTP连接
- 1.建立TCP三次握手,发送请求内容, 请求头、请求的行、请求的主体
- 2.将请求传递给负载均衡, 负载均衡做对应的调度
- 3.如果请求的是静态页面, 那么调度至对应的静态集群组即可
- 4.如果请求的是动态页面, 将请求调度至动态集群组
- 1.如果仅仅是请求页面, 可能会经过Opcache缓存返回
- 2.如果请求页面需要查询数据库, 或者是往数据库插入内容
- 3.检查对应的操作是查询还是写入, 如果是查询数据库
- 4.检查查询的内容是否有被缓存, 如有缓存则返回
- 5.检查查询语句, 将查询结果返回
- 6.内存缓存Redis缓存对应的查询结果
- 7.返回对应客户端请求的内容至于WEB节点
- 8.WEB节点收到请求后返回内容至负载均衡
- 9.负载均衡返回客户端内容, TCP四次断开
- 3.HTTP断开连接
面试时需注意:
1.按照分层结构 CDN层->负载层->WEB层->存储层->缓存层->数据库层 同时需要注意, 每一层都有对应的缓存机制
Nginx优化方案
Nginx优化
1.gzip压缩
2.expires静态文件缓存
3.调整网络IO模型,调整Nginx worker进程的最大连接数
5.隐藏Nginx名称和版本号
6.配置防盗链,防止资源被盗用
7.禁止通过IP地址访问,禁止恶意域名解析,只允许域名访问
8.防DDOS、cc攻击, 限制单IP并发请求连接
9.配置错误页面,根据错误代码指定网页反馈用户
10.限制上传资源目录被程序访问,防止木马入侵系统
11.Nginx加密传输优化
Nginx架构总结
基于Nginx中间件的架构
- 1.了解需求(定义Nginx在服务体系中的角色)
- 静态资源服务的功能设计
- 类型分类(视频、图片、html)
- 浏览器缓存
- 防盗链
- 流量限制
- 防资源盗用
- 压缩(压缩模式, 压缩比例, 压缩类型)
- 代理服务
- 协议类型
- 正向代理
- 反向代理
- 负载均衡
- 代理缓存
- 头信息处理
- Proxy_Pass
- LNMP
- 动静分离
- 静态资源服务的功能设计
- 2.设计评估
- 硬件 CPU、内存、磁盘
- 系统(用户权限、日志目录存放)
- 代理服务/负载均衡 (CPU、内存)
- 静态资源服务(硬盘容量、硬盘转速)
- 动态资源服务(硬盘转速、读写效率)
- 缓存资源服务(SSD固态)
- 3.配置注意事项
- 合理配置
- 了解原理
- http协议原理
- http状态原理
- 操作系统原理
- 关注日志
- 日志是否有打开
- 是否有对应请求
- 请求状态码信息符合
- 错误日志信息吐出来
- 错误日志内容和含义
Nginx常见典型故障
*1.为什么nginx里面有的是浏览器渲染出的页面,有的时候就变成下载文件?* 这个一个取决于服务端nginx,一个取决于你浏览器。在Nginx服务端的配置文件目录下,有一个mime.types 文件,内容如下
types {
    text/html                             html htm shtml;
    text/css                              css;
    text/xml                              xml;
    image/gif                             gif;
    image/jpeg                            jpeg jpg;
    application/javascript                js;
    application/atom+xml                  atom;
    application/rss+xml                   rss;
    text/mathml                           mml;
    text/plain                            txt;
    text/vnd.sun.j2me.app-descriptor      jad;
    text/vnd.wap.wml                      wml;
    text/x-component                      htc;
这里,如text/html格式的字符串就是用来说明数据类型的,/前的是主类型,/之后的是该主类型下的子类型。详细的类型定义在RFC2046中。 Nginx通过服务器端文件的后缀名来判断这个文件属于什么类型,再将该数据类型写入HTTP头部的Content-Type字段中,发送给客户端 比如,当我们打开一个页面,看到一个PNG格式的图片的时候,Nginx是这样发送格式信息的: 服务器上有test.png这个文件,后缀名是png; 根据mime.types,这个文件的数据类型应该是image/png; 将Content-Type的值设置为image/png,然后发送给客户端。 我们在Chrome浏览器中可以看到这个文件返回的头部信息,并对应的宣传出来,如果不能识别则设置为下载文件。
*2.multi_accept on的作用是什么?能不能通用配置?* 这个数值默认就是on建议采用默认设置, multi_accept的作用是告诉nginx收到一个新连接通知后接受尽可能多的连接,多个worker按串行方式来处理连接,也就是一个连接只有一个worker被唤醒,其他的处于休眠状态 设置为off后,多个worker按并行方式来处理连接,也就是一个连接会唤醒所有的worker,直到连接分配完毕,没有取得连接的继续休眠。当你的服务器连接数不多时,开启这个参数会让负载有一定的降低,但是当服务器的吞吐量很大时,为了效率,可以关闭这个参数。
*3.同一台机器通过进程socket文件快还是通过localhost:9000这个方式快?彼此之间各有什么坑吗?* 这两个模式不一样,一般对于程序联系更为紧密的,可以使用进程间共享内存调用,这样效率更高。 Socket方式 如果,两个进程是松耦合的,那么用接口调用模式更佳。IP:PORT方式 当前,我们对于系统设计讲究松耦合,微服务的模式,所以版本通过api接口模式调用更为广泛应用。
*4.nginx +tomcat 后台服务响应内容比较大,日志报"an upstream response is buffered to a temporary file"的warn,通常这种情况需要配置网站的 Proxy Buffer相关的参数,但proxy buffer相关的参数,我应该配置多大合理* 这个buffer缓冲区设置是根据实际的 Response 大小来定,假设你是这么设置的:
fastcgi_buffers 8 5K;
fastcgi_buffer_size 5K;
#那么内存的缓存区最大能缓存的大小是 5K * 8 = 40K,如果Nginx代理的后台页面超过这个大小,那就会出现这个错误。
#因为,频繁的写硬盘会影响性能,所以这个参数还是值得适当的根据实际情况优化的*5.关于try_files,怎么在生产中真正结合缓存,代理用?如下例:*
server {
    ...
        location {
            try_files /app/cache/ $uri @fallback;
            index  index.html;
        }
    ...

}
我们可以用后台程序将缓存信息生成到\(document_root/app/cache/目录下,它将检测,\)document_root/app/cache/index.html 和\(document_root\)uri是否有静态缓存生成的文件存在,如果不存在着内部重定向到@fallback(@表示配置文件中预定义标记点)。
*6.nginx在配置https时,如何匹配某个URL地址不做https跳转,如下例:*
server {
    listen 80;
    server_name xuliangwei.com;
    root /code;
    location / {
        #如果url不匹配这个则进行跳转https,匹配则走本地的root查询内容
        if ($request_uri !~ '^/bgx/') {
            return 301 https://$server_name$request_uri;
        }
    }
}

server {
    ....
    listen 443;
    server_name xuliangwei.com;
    ....
}*7.使用nginx负载均衡时,如何将后端请求超时的服务器流量平滑的切换到另一台上。* 如果后台服务连接超时,Nginx是本身是有机制的,如果出现一个节点down掉的时候,Nginx会更据你具体负载均衡的设置,将请求转移到其他的节点上,但是,如果后台服务连接没有down掉,但是返回错误异常码了如:504、502、500,这个时候你需要加一个负载均衡的设置,如下: proxy_next_upstream http_500 | http_502 | http_503 | http_504 |http_404; 意思是,当其中一台返回错误码404,500…等错误时,可以分配到下一台服务器程序继续处理,提高平台访问成功率。
server {
    listen 80;
    server_name xuliangwei.com;

    location / {
        proxy_pass http://node;
        proxy_next_upstream error timeout http_500 http_502 http_503 http_504;
    }
}*8.如何使用nginx的proxy_next_upstream将nginx错误页面返回json* 需求是除了404 页面,其他的错误页面都要返回 json,而且在外界看来是正常的,所以说白了就是后端服务器返回了我定义的错误状态码,需要在nginx这里做一个转换,转换到 200,用户看到的是200,其实是将错误的状态码定向至200,然后再次调度到/api。
server {
    listen 80;
    server_name www.bgx.com;

    location / {
        proxy_intercept_errors on;                  #反向代理默认不支持自定义错误页面,需要增加该参数
        proxy_set_header Host $host;
        proxy_pass http://www_server3_plools;
        proxy_set_header X-Forwarded-For $remote_addr;
        proxy_next_upstream error timeout http_503 non_idempotent;
        proxy_set_header X-Forwarded-For $proxy_add_x_forwarded_for;
    }

    #出现500等错误都返回给用户200状态,并跳转至/api
    error_page 500 502 503 504 =200 /api;
    location = /api{
        default_type application/json;
        return 200 '{"retCode":"1001","retMsg":"invoke failed"}';
}*9.负载均衡配置,当挂掉一台服务时,不能流畅地切换* 需求:在配置负载均衡时,后端三台web,手动关闭一个web 服务,当轮询到这台关停的时候,总是要卡顿很久?
#可以如下这两个参数:
proxy_connect_timeout 600;  #1分钟
proxy_read_timeout 600;     #1分钟